I never expected tying a clay bead bracelet with clasp to become such an enjoyable activity until I tried it for the first time. The procedure becomes a small exploration while each bead contains its unique narrative.
Tying a knot seems easy but the actual process is more complex. The correct technique serves to both secure your bracelet and provide your style with a distinctive personal flair.
Anyone who has faced difficulties while trying to tie a clay bead bracelet with a clasp understands that they’re not the only one who struggled. I will guide you through the process today while providing several tips to ensure flawless tying each time.
Why Tying Clay Bead Bracelet with Clasp Matters
Making my first clay bead bracelet brought an unexpected personal connection that I had not anticipated. Every bead reflects my mood or memory. The entire experience becomes problematic when the clasp isn’t secured correctly.
Securing the clasp of a clay bead bracelet properly is essential for its functionality. The appearance of a bracelet needs to be accompanied by the confidence it provides. The bracelet needs to remain securely fastened for the entire day.
The feeling of losing my bracelet when it slips off is unbearable. A strong clasp will ensure your design remains intact and effective. Knowing your jewelry is securely assembled makes you feel more fashionable.
Best String for Tying Clay Bead Bracelets
The choice of string has a significant impact on both the appearance and durability of your bracelet.
Elastic Cord
It’s stretchy and comfy. This wearable option suits daily use but lacks considerable strength.
Nylon Thread
Ideal for tying strong knots for bracelets. It holds tight and doesn’t fray easily.
Waxed Cotton Cord
This cord provides a natural rustic appearance and functions well to secure clasps. Plus, the wax helps with grip.
Fishing Line or Monofilament
Invisible but very strong. Delicate clay bead bracelets benefit from the use of fishing line or monofilament because of its strength and invisibility.
Select stretch cords for a casual design and nylon or waxed cords to achieve an elegant look.
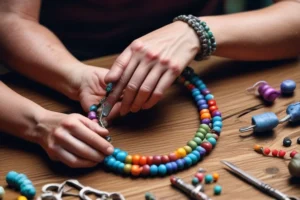
Choosing the Right Clay Beads and Clasp for Your Bracelet
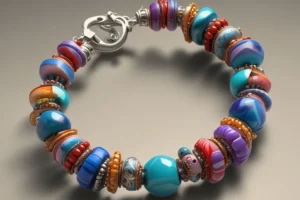
The fun starts with choosing your beads. I choose soft pastels or bold colors based on my mood when selecting beads. There are days when lavender beads seem perfect while other days demand the presence of turquoise beads.
The clasp is equally important when selecting beads for your bracelet. Through experimentation I learned that lobster clasps perform best when used with thicker string. Magnetic clasps give an elegant look but they tend to open unintentionally when they don’t match their strings properly.
I make sure that color choices and textures complement each other. Your bracelet will stand out when both elements feel cohesive together. I double-check the clasp style before finalizing knots for clay bead bracelets. Even small details have the power to transform the entire atmosphere.
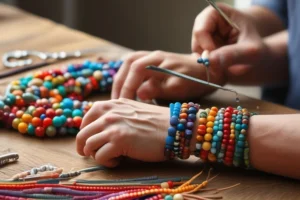
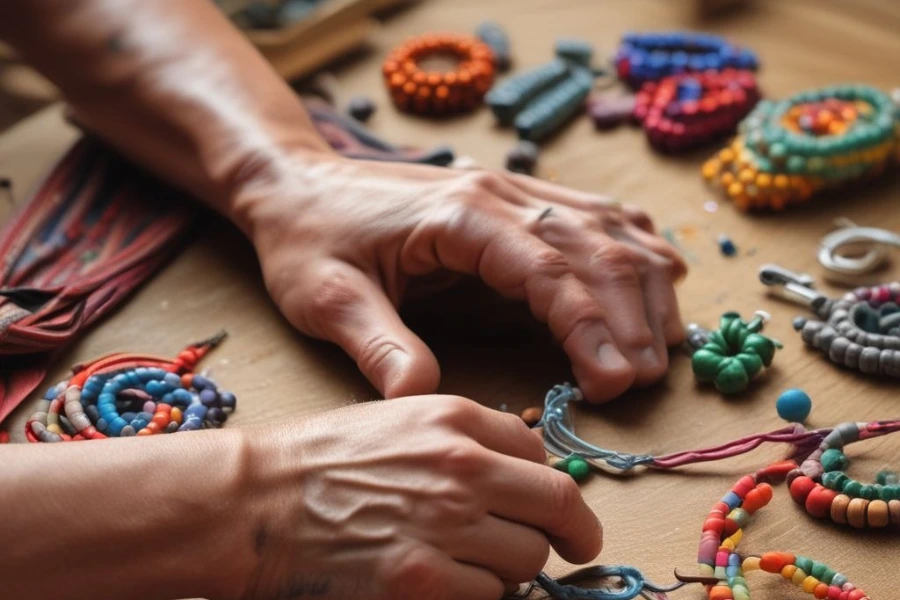
Step by Step Guide to Tie Clay Bead Bracelet with Clasp
Before I start, I make sure to lay out everything that I will need. I cut my string longer than necessary because I wanted to be prepared. Once the beads are attached I move the clasp to its position.
I guide the string through with a firm smooth movement. Then comes the knot. It must be tight but not harsh. Various methods exist for tying bracelets but maintaining consistent technique is crucial.
Test the strength by applying gentle tension to both ends. Before cutting away any surplus string I give it a slight pull. I feel a sense of accomplishment when I complete making a bracelet that stays intact.
Tips for Securely Fastening Your Clay Bead Bracelet
Experiencing bracelets slipping off in public situations has always been unpleasant for me. That’s why I now take fastening seriously. Learning to tie double or triple knots was my initial lesson in securing bracelets.
You must ensure there is absolutely no slack when tying strong knots for bracelets. To finish off the knot I apply a small amount of clear glue. It keeps things secure without looking messy.
Ensure the glue fully dries prior to wearing your bracelet. That tiny wait makes a big difference. The way I fasten these bracelets always makes me feel both relaxed and confident whenever I wear them.
Common Mistakes to Avoid When Trying Clay Bead Bracelets
I’ve made so many mistakes while learning. My knots came undone leading to beads dropping off and clasps breaking. Initially I selected an incorrect thread size for my project. It frayed fast.
I secured my knot near the clasp which left no room for adjustments. The lack of checking knot tension became another major mistake for me. Loose knots look bad and don’t last. I have learned to test all components thoroughly before completing any work.
Good bracelet tying practices help you avoid unnecessary frustration. When you start learning or reviewing basic skills take time to carefully check each bracelet making step. It truly changes your crafting experience.
Creative Ways to Style Clay Bead Bracelets with Clasp
I love stacking different styles together. I choose a pastel mix for one day followed by beachy blue vibes the next. Mixing sizes adds depth. The contrast between a large bead and smaller ones creates a striking visual effect.
I use letter beads in my stacks to display names or brief messages. Recently I noticed people started to insert charms between the beads in their bracelets. It gives bracelets a fun, custom look. Other wrist accessories paired with your bracelet create an extra touch of style.
Make sure that each component matches well with its subsequent parts. Choose one color to unify all your bracelet elements. The overall appearance remains stylish without becoming too overwhelming.
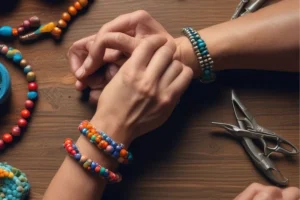
How to Adjust Your Clay Bead Bracelet for Perfect Fit
Nothing compares to the discomfort of a bracelet that either squeezes too tightly or doesn’t stay in place. I always make mine slightly longer first. Creating this space helps me make the necessary adjustments prior to securing the bracelet.
After determining the proper fit I will then make it secure. I tighten the knot if it appears too loose during my adjustment process. My wrist became sore because I tied it too tightly before so now I always test for comfort before cutting the string.
Discovering the most effective string for tying clay bead bracelets had a significant impact. Some stretch slightly, which helps. The perfect fit ensures that the bracelet feels like a natural extension of your person while wearing it.
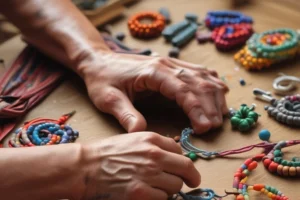
Best Tools for Tying Clay Bead Bracelets in Style
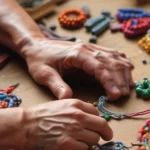
My hands were my sole tools for the job. But tools changed everything. Sharp scissors provide a precise finish for every cut. The bead stopper functions to secure your beadwork layout. My favorite is the knotting tweezer.
It helps grip tightly while tying. A small clipboard provides excellent support when I hold the bracelet during my work process. I gain improved control while having my hands free. Good lighting makes such a difference too.
Avoid letting loose knots slip by unnoticed. The simple investment in basic tools has transformed my bracelet crafting into a smoother and cleaner process that is much more enjoyable throughout the entire procedure.
How to Add Personal Touch to Clay Bead Bracelet Design
The bracelets I create convey small narratives within their designs. My creative process begins by identifying a mood or moment which I wish to capture in my jewelry design. After that I pick beads which resonate with the intended emotion.
Sometimes I add initials or birthstones. Creating a distinctive appearance by combining matte and glossy textures is something I enjoy doing. Selecting colors based on natural elements or seasonal palettes enhances theme creation.
A bracelet takes on a lively quality when you incorporate spring greens or autumn reds. The personal touch emerges from intentional creation. It doesn’t need to be perfect. The bracelet becomes meaningful when it resonates with you. Every bracelet becomes a small fragment of your identity through this process.
Care Tips for Keeping Your Clay Bead Bracelet in Top Shape
Having invested time in crafting a bracelet deserves a long-lasting result. So I care for it gently. I remove it before showers or workouts. Moisture weakens the string over time. A soft pouch protects my bracelets from dust and scratches. The use of a damp cloth to clean the bracelet helps keep its color intact.
I never stretch them too far. Regularly testing the clasp every few weeks is a good practice. I fix any loose parts right away. When your bracelet remains in excellent condition you can continue to proudly display your favorite style over and over.
Conclusion
You now possess the knowledge to secure clay bead bracelets with clasps that combine both fashion appeal and reliable fastening. The process of tying clay bead bracelets requires attention to detail from selecting superior string to perfecting tying skills.
No matter which bracelet number you’re making, pay attention to strong knots and secure clasps while also adding creative touches. Proper methods extend your bracelets’ life and improve their appearance.
Begin crafting your piece, start tying the elements, and show your unique style with every bead you use.
Frequently Asked Question
Can you tie clay bead bracelets without crimp beads?
Yes, you definitely can. All my bracelets that I have made without crimp beads remain sturdy as long as they are properly tied. The essential step involves creating robust knots and pulling them securely to ensure they hold. I always double-knot and tug firmly. To ensure maximum security I apply a small amount of transparent adhesive. It’s simple, clean, and works beautifully. No fancy hardware needed.
How to prevent clay bead bracelet knots from slipping?
Knots slipping from my previous projects have been an ongoing source of frustration. My technique involved making sturdy knots in layers and pulling on each one to secure them. Before completing the task, I perform a gentle stretch on the string to ensure its strength. The experience taught me that smoother cords tend to slide more easily while rougher textures provide better grip. Taking time at this stage prevents the entire design from disintegrating.
Should you use glue on the knots when tying clay bead bracelets?
Yes, and I swear by it now. Because I chose not to use glue initially I lost a cherished bracelet. After securing the knot I apply a tiny amount of clear jewelry glue. The glue disappears from view once it dries while maintaining full grip on all bracelet components. Just let it dry fully before wearing. I feel more secure in my work whenever I follow this single additional step.
Is elastic cord good for tying clay bead bracelets with a clasp?
Elastic cord functions properly but my experiences have varied. This material stretches well but tends to have poor compatibility with certain clasp types. Ensure that the elastic cord you choose has adequate thickness to support the weight and practice tight knot techniques. For tying clay bead bracelets with clasps my choice is nylon or waxed cord because they provide better durability. The materials endure daily use while maintaining better durability.
Can I tie a clay bead bracelet with magnetic clasps?
Yes, and I’ve done it often. Magnetic clasps deliver a sleek aesthetic while being extremely simple to put on. These clasps require strong knots and proper fit to maintain their attachment to the bracelet. I lost my bracelet one day because I had tied it too loose. For additional security I combine double-knotting with glue application. Magnetic clasps achieve both a fashionable look and an easy-to-use feel when secured properly.