Category: Guide

  • How to Properly Tie Bead Bracelet Without Clasp in an Easy Way?

    How to Properly Tie Bead Bracelet Without Clasp in an Easy Way?

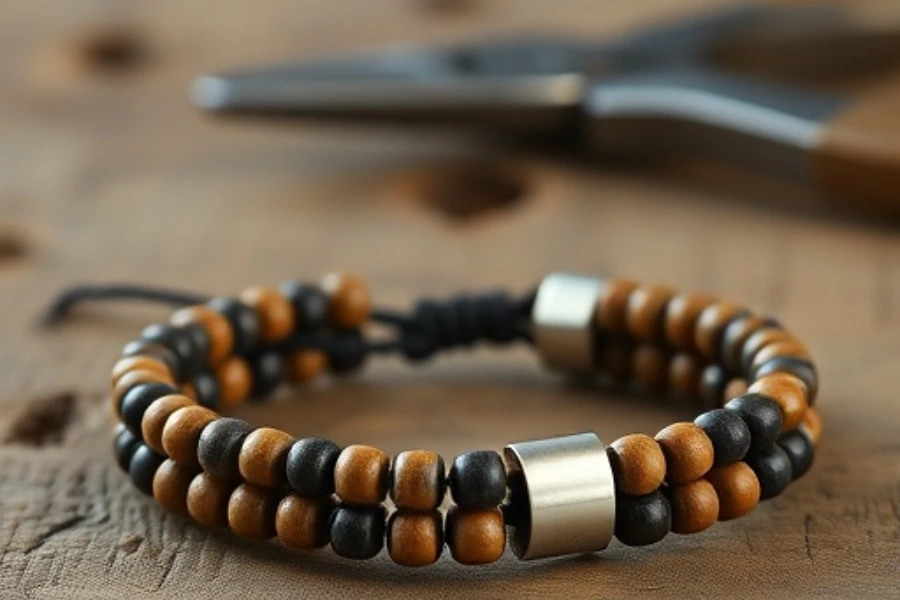
    The first time I attempted to tie a bead bracelet without a clasp remains vivid in my memory. My hands shook with excitement. I couldn’t understand why this basic task generated such deep significance.

    I aimed to create a unique item that was solely intended for my personal enjoyment. I wanted to avoid making errors but at the same time I wanted to prevent it from appearing overly refined. Just raw, handmade beauty.

    This learning experience transformed my perspective on jewelry. It’s not just craft, it’s connection. I understand the struggle to finish a bracelet with a neat appearance because I’ve experienced it myself. I want to demonstrate the straightforward approach which I discovered.

    Why Go Clasp-Free for Your Beaded Bracelets

    I experienced repeated problems with clasps that refused to fit together correctly. They’d twist or break, ruining my vibe. I found joy in creating bead bracelets that don’t need a closure.

    It felt so free, so personal. No metal, just thread and intention. It’s not just about skipping hardware. The bracelet attaches to your skin and moves with every action you make. I’ve found this style trending more lately.

    It’s minimal yet meaningful. For a sleek natural appearance this method delivers. Trust me, it’s not harder, just more thoughtful. And the feeling of creating it yourself? Absolutely worth every knot. 

    Choosing the Right String for Beadwork Projects

    I selected a string because of its beauty which later turned out to be a mistake. Big mistake. It snapped before the day ended. Time taught me that the type of thread we use is more important than most people consider.

    When crafting bead bracelets without metal findings my choice always falls on durable and flexible cord materials. Stretch cords perform extremely well yet waxed threads provide adequate performance as well. They hold knots well and feel smooth. Don’t go for looks only to test your strength too.

    Your ideal accessory combines both comfort and style. Since I started using higher quality threads my bracelets have become more durable. They also feel more authentic. The material you select as your foundation establishes the standard for all subsequent knots.

    Prepping Your Beads and Thread for Best Results

    My regret followed whenever I rushed through this step. I spend more time on preparing beads and checking thread length twice before I begin. I organize all materials visibly before I begin any project. It helps avoid mid-process tangles or mismatches.

    It helps avoid mid-process tangles or mismatches. I slightly burn the ends of threads to simplify the threading process. To complete beaded bracelets without clasps proper preparation remains essential.

    Select beads whose holes correspond to the thickness of your string. Use a file to smooth rough edges whenever necessary. The final bracelet feels cleaner because of that little extra attention. Careful preparation ensures that the finished piece remains both attractive and durable.

    How to Start a Beaded Bracelet with No Clasp

    The beginning of my jewelry-making without clasps left me feeling completely confused. Eventually I discovered a technique that felt natural to me. I start by folding the thread in half and then create a loop before moving beads from both sides.

    This loop makes the bracelet adjustable later. The design receives a clean anchor through this method. The process of making adjustable bead bracelets without clasps enabled me to create gifts for friends with ease. No sizing stress. The design develops naturally and that’s what I admire.

    Beginning with this approach enhanced my ability to produce thoughtful and flexible work. My work process felt more about creating something original than just replicating an established method.


    Easy Knot Techniques for a Strong Bracelet Hold

    For several weeks I battled with knots that consistently came apart. I discovered the miracle of two surgeon’s knots and double knots that solved my problem. I gradually apply pressure to tighten them while maintaining tension along the cord.

    That makes them hold firm without burning. Discovering effective knotting techniques for beaded bracelets revolutionized my crafting experience. Because my bracelets no longer fell apart I wore them with pride.

    My standard practice includes applying a small amount of glue or clear nail polish. Just to lock it in place quietly. You spend only seconds tying the knots yet you gain everlasting peace of mind. Handmade jewelry gains confidence from using strong knots.

    Using Stretch Cord for a Seamless Bracelet Finish

    Stretch cords saved me so many times. The stretch cords offer both flexibility and smoothness while providing a comfortable fit on your wrist. The stretch cords emerged as a magical solution when I began tying bead bracelets without closures.

    I managed to put the bracelet on and take it off without causing any harm. I don’t need to use heavy coatings or additional hardware elements. These cords adapt to wrist shapes and easily return to their original form.

    Avoiding overstretched knots is essential. While tying my bracelet I gently pull the stretch cord to maintain tension. This little trick gives the perfect balance. Stretch cord serves as your ideal tool for crafting when you look for both simplicity and style.

    Securing Your Ends with Invisible Jewelry Knots

    The final knot always ruined the overall appearance of my products. The knot sticking out was noticeable to me and it caused me irritation. I discovered the method to hide bead bracelet knots without drawing attention to them.

    Position them between two beads to make them virtually invisible. I either slightly melt the end or apply a small amount of glue. Nothing too obvious, just clean and smooth. After I learned proper knot tucking techniques my bracelets appeared as though they were crafted by professionals.

    That subtle polish really stands out. I now take pride in every finish. A bracelet that feels great and looks equally impressive provides deep satisfaction.

    Stylish Ways to Hide Bracelet Knots Without Clasps

    I wrapped tape around the ends because I believed it provided a solution. It didn’t. I currently conceal knots inside big beads or use slide covers. As I began searching for methods to finish bead bracelets without the need for clasps my focus shifted entirely to their visual appeal.

    Clean lines matter. For hiding knots I occasionally select charm beads that feature wide holes. On other occasions I finish them by wrapping decorative thread in a boho style. I also love using leather wraps. They cover the end and add flair.

    Creativity transforms practical objects into bold statements. These handmade items gain their unique personal touch and stylish flair from this creative finishing process.

    Common Mistakes When Tying Bead Bracelets

    I’ve made every possible error when working with beads. Too tight, too loose, uneven beads. I once failed to measure the length before tying the knot. It barely fit my wrist. When you make bead bracelets without metal findings you eliminate the option to use hardware for later adjustments.

    Precise measuring and tension control become essential in bracelet making because there’s no way to correct mistakes after the knots are tied. Also, don’t pull knots too quickly. Let the cord adjust naturally.

    I made complex designs because I believed more details led to better outcomes. But really, simplicity and mindfulness win. Learn from each bracelet. Every mistake made me better. Trust your hands. They’ll guide you as your skill grows.

    Troubleshooting Common Mistakes

    Sometimes knots slip. Other times your bracelet stretches out. These problems are fixable. 

    • Slipping knots need either glue application or a double knot solution for stability.
    • Use either glue or flame to seal the ends of a frayed cord.
    • Too tight/loose – Adjust before trimming. 
    • Plan your bead arrangement ahead of time to prevent uneven beads.

    Patience is key. Repetitive practice will lead to achieving a flawless finish.

    Final Touches to Make Your Bracelet Look Pro

    The whole atmosphere shifts with the smallest details. After completing my bracelets I carefully trim away any loose ends. I smooth every bead line gently. When finishing bead bracelets without clasps the polishing process becomes crucial. At times I apply sheen by using a wax cloth to rub beads.

    I always smile whenever I compare my latest pictures with my original photos. I used to rush and regret it. Now I breathe through the last step. The final touch isn’t just about looks. It’s about celebrating what you created. That moment of pride? The feeling of pride remains present each time you wear the piece.

    Frequently Asked Questions

    What knots work best for bead bracelets without clasps?

    It took me several weeks of trial and error to discover that basic knots lacked sufficient strength. The combination of the surgeon’s knot with a double knot led to my breakthrough. I carefully tighten each knot while maintaining cord tension. After tying the knot I apply a small amount of glue or clear polish to keep it in place. These knots changed everything for me. No more slipping. These knots offer strength while remaining easy to tie which provides me peace of mind. I began to wear my bracelets every day without any concerns. I gained satisfaction from realizing my creations could endure everyday situations.

    Best string for making bead bracelets without clasps.

    I once selected a pretty string for a project but it snapped by the end of the day. That moment taught me a big lesson. Whenever I choose my materials now I pick options that provide strength and flexibility. Stretch cord maintains the first position on my preferred materials list due to its smooth texture and dependable knot retention. For rustic designs I have used waxed thread to achieve the desired earthy appearance. Before using any thread or cord one must test its strength. As I shifted to higher quality strings my bracelets maintained their durability while becoming more comfortable to wear.

    Can you make a bead bracelet on elastic without a clasp?

    The experience totally shifted my perspective on creating jewelry. I approached the elastic cord with doubt when I first used it. The moment I tried on my first completed bracelet it fit flawlessly like magic. The bracelet fits perfectly because it simply wraps around my wrist without any clasps. A clean and flexible bracelet requires just a gentle stretch of the cord during knotting. I experience a profound sense of liberation when I can create jewelry without relying on metal components. After sharing the bracelets with my friends they also appreciated their simplicity. It feels handmade and full of intention. 

    What type of thread is best for tying bead bracelets without clasps?

    I always believed any thread would work until my preferred bracelet unexpectedly broke. Since then, I never compromise. High-quality stretch cord or waxed thread becomes my choice for clasp-free bracelet designs. Stretch cord creates a tidy finish while waxed thread provides strong security. The ability of both options to maintain knot integrity stands as the most crucial factor. I never use threads that show weakness or fraying when exposed to tension. By choosing better materials for my bracelets I achieved both professional quality and emotional resonance. The foundation of your bracelet determines its durability and strength.
  • How to Properly Tie Clay Bead Bracelets with Clasp in Style?

    How to Properly Tie Clay Bead Bracelets with Clasp in Style?

    I never expected tying a clay bead bracelet with clasp to become such an enjoyable activity until I tried it for the first time. The procedure becomes a small exploration while each bead contains its unique narrative.

    Tying a knot seems easy but the actual process is more complex. The correct technique serves to both secure your bracelet and provide your style with a distinctive personal flair.

    Anyone who has faced difficulties while trying to tie a clay bead bracelet with a clasp understands that they’re not the only one who struggled. I will guide you through the process today while providing several tips to ensure flawless tying each time.

    Why Tying Clay Bead Bracelet with Clasp Matters

    Making my first clay bead bracelet brought an unexpected personal connection that I had not anticipated. Every bead reflects my mood or memory. The entire experience becomes problematic when the clasp isn’t secured correctly.

    Securing the clasp of a clay bead bracelet properly is essential for its functionality. The appearance of a bracelet needs to be accompanied by the confidence it provides. The bracelet needs to remain securely fastened for the entire day.

    The feeling of losing my bracelet when it slips off is unbearable. A strong clasp will ensure your design remains intact and effective. Knowing your jewelry is securely assembled makes you feel more fashionable.

    Best String for Tying Clay Bead Bracelets

    The choice of string has a significant impact on both the appearance and durability of your bracelet.

    Elastic Cord 

    It’s stretchy and comfy. This wearable option suits daily use but lacks considerable strength.

    Nylon Thread 

    Ideal for tying strong knots for bracelets. It holds tight and doesn’t fray easily. 

    Waxed Cotton Cord 

    This cord provides a natural rustic appearance and functions well to secure clasps. Plus, the wax helps with grip. 

    Fishing Line or Monofilament 

    Invisible but very strong. Delicate clay bead bracelets benefit from the use of fishing line or monofilament because of its strength and invisibility.

    Select stretch cords for a casual design and nylon or waxed cords to achieve an elegant look.

    Choosing the Right Clay Beads and Clasp for Your Bracelet

    The fun starts with choosing your beads. I choose soft pastels or bold colors based on my mood when selecting beads. There are days when lavender beads seem perfect while other days demand the presence of turquoise beads.

    The clasp is equally important when selecting beads for your bracelet. Through experimentation I learned that lobster clasps perform best when used with thicker string. Magnetic clasps give an elegant look but they tend to open unintentionally when they don’t match their strings properly.

    I make sure that color choices and textures complement each other. Your bracelet will stand out when both elements feel cohesive together. I double-check the clasp style before finalizing knots for clay bead bracelets. Even small details have the power to transform the entire atmosphere.

    Step by Step Guide to Tie Clay Bead Bracelet with Clasp

    Before I start, I make sure to lay out everything that I will need. I cut my string longer than necessary because I wanted to be prepared. Once the beads are attached I move the clasp to its position.

    I guide the string through with a firm smooth movement. Then comes the knot. It must be tight but not harsh. Various methods exist for tying bracelets but maintaining consistent technique is crucial.

    Test the strength by applying gentle tension to both ends. Before cutting away any surplus string I give it a slight pull. I feel a sense of accomplishment when I complete making a bracelet that stays intact.

    Tips for Securely Fastening Your Clay Bead Bracelet

    Experiencing bracelets slipping off in public situations has always been unpleasant for me. That’s why I now take fastening seriously. Learning to tie double or triple knots was my initial lesson in securing bracelets.

    You must ensure there is absolutely no slack when tying strong knots for bracelets. To finish off the knot I apply a small amount of clear glue. It keeps things secure without looking messy.

    Ensure the glue fully dries prior to wearing your bracelet. That tiny wait makes a big difference. The way I fasten these bracelets always makes me feel both relaxed and confident whenever I wear them.

    Common Mistakes to Avoid When Trying Clay Bead Bracelets

    I’ve made so many mistakes while learning. My knots came undone leading to beads dropping off and clasps breaking. Initially I selected an incorrect thread size for my project. It frayed fast.

    I secured my knot near the clasp which left no room for adjustments. The lack of checking knot tension became another major mistake for me. Loose knots look bad and don’t last. I have learned to test all components thoroughly before completing any work.

    Good bracelet tying practices help you avoid unnecessary frustration. When you start learning or reviewing basic skills take time to carefully check each bracelet making step. It truly changes your crafting experience. 

    Creative Ways to Style Clay Bead Bracelets with Clasp

    I love stacking different styles together. I choose a pastel mix for one day followed by beachy blue vibes the next. Mixing sizes adds depth. The contrast between a large bead and smaller ones creates a striking visual effect.

    I use letter beads in my stacks to display names or brief messages. Recently I noticed people started to insert charms between the beads in their bracelets. It gives bracelets a fun, custom look. Other wrist accessories paired with your bracelet create an extra touch of style.

    Make sure that each component matches well with its subsequent parts. Choose one color to unify all your bracelet elements. The overall appearance remains stylish without becoming too overwhelming.

    How to Adjust Your Clay Bead Bracelet for Perfect Fit

    Nothing compares to the discomfort of a bracelet that either squeezes too tightly or doesn’t stay in place. I always make mine slightly longer first. Creating this space helps me make the necessary adjustments prior to securing the bracelet.

    After determining the proper fit I will then make it secure. I tighten the knot if it appears too loose during my adjustment process. My wrist became sore because I tied it too tightly before so now I always test for comfort before cutting the string.

    Discovering the most effective string for tying clay bead bracelets had a significant impact. Some stretch slightly, which helps. The perfect fit ensures that the bracelet feels like a natural extension of your person while wearing it.

    Best Tools for Tying Clay Bead Bracelets in Style

    My hands were my sole tools for the job. But tools changed everything. Sharp scissors provide a precise finish for every cut. The bead stopper functions to secure your beadwork layout. My favorite is the knotting tweezer.

    It helps grip tightly while tying. A small clipboard provides excellent support when I hold the bracelet during my work process. I gain improved control while having my hands free. Good lighting makes such a difference too.

    Avoid letting loose knots slip by unnoticed. The simple investment in basic tools has transformed my bracelet crafting into a smoother and cleaner process that is much more enjoyable throughout the entire procedure.

    How to Add Personal Touch to Clay Bead Bracelet Design

    The bracelets I create convey small narratives within their designs. My creative process begins by identifying a mood or moment which I wish to capture in my jewelry design. After that I pick beads which resonate with the intended emotion.

    Sometimes I add initials or birthstones. Creating a distinctive appearance by combining matte and glossy textures is something I enjoy doing. Selecting colors based on natural elements or seasonal palettes enhances theme creation.

    A bracelet takes on a lively quality when you incorporate spring greens or autumn reds. The personal touch emerges from intentional creation. It doesn’t need to be perfect. The bracelet becomes meaningful when it resonates with you. Every bracelet becomes a small fragment of your identity through this process.

    Care Tips for Keeping Your Clay Bead Bracelet in Top Shape

    Having invested time in crafting a bracelet deserves a long-lasting result. So I care for it gently. I remove it before showers or workouts. Moisture weakens the string over time. A soft pouch protects my bracelets from dust and scratches. The use of a damp cloth to clean the bracelet helps keep its color intact.

    I never stretch them too far. Regularly testing the clasp every few weeks is a good practice. I fix any loose parts right away. When your bracelet remains in excellent condition you can continue to proudly display your favorite style over and over.

    Conclusion

    You now possess the knowledge to secure clay bead bracelets with clasps that combine both fashion appeal and reliable fastening. The process of tying clay bead bracelets requires attention to detail from selecting superior string to perfecting tying skills.

    No matter which bracelet number you’re making, pay attention to strong knots and secure clasps while also adding creative touches. Proper methods extend your bracelets’ life and improve their appearance.

    Begin crafting your piece, start tying the elements, and show your unique style with every bead you use.

    Frequently Asked Question

    Can you tie clay bead bracelets without crimp beads?

    Yes, you definitely can. All my bracelets that I have made without crimp beads remain sturdy as long as they are properly tied. The essential step involves creating robust knots and pulling them securely to ensure they hold. I always double-knot and tug firmly. To ensure maximum security I apply a small amount of transparent adhesive. It’s simple, clean, and works beautifully. No fancy hardware needed. 

    How to prevent clay bead bracelet knots from slipping?

    Knots slipping from my previous projects have been an ongoing source of frustration. My technique involved making sturdy knots in layers and pulling on each one to secure them. Before completing the task, I perform a gentle stretch on the string to ensure its strength. The experience taught me that smoother cords tend to slide more easily while rougher textures provide better grip. Taking time at this stage prevents the entire design from disintegrating.


    Should you use glue on the knots when tying clay bead bracelets?

    Yes, and I swear by it now. Because I chose not to use glue initially I lost a cherished bracelet. After securing the knot I apply a tiny amount of clear jewelry glue. The glue disappears from view once it dries while maintaining full grip on all bracelet components. Just let it dry fully before wearing. I feel more secure in my work whenever I follow this single additional step.

    Is elastic cord good for tying clay bead bracelets with a clasp?

    Elastic cord functions properly but my experiences have varied. This material stretches well but tends to have poor compatibility with certain clasp types. Ensure that the elastic cord you choose has adequate thickness to support the weight and practice tight knot techniques. For tying clay bead bracelets with clasps my choice is nylon or waxed cord because they provide better durability. The materials endure daily use while maintaining better durability.

    Can I tie a clay bead bracelet with magnetic clasps?

    Yes, and I’ve done it often. Magnetic clasps deliver a sleek aesthetic while being extremely simple to put on. These clasps require strong knots and proper fit to maintain their attachment to the bracelet. I lost my bracelet one day because I had tied it too loose. For additional security I combine double-knotting with glue application. Magnetic clasps achieve both a fashionable look and an easy-to-use feel when secured properly.

  • Lock It Right: How to Put Clasp on a Clay Bead Bracelet Easily?

    Lock It Right: How to Put Clasp on a Clay Bead Bracelet Easily?

    Putting a clasp on a clay bead bracelet was my first attempt. The task appeared simple yet achieving perfection in its execution provided deep satisfaction. Attaching the clasp served a greater purpose because it was necessary to secure the bracelet for wearing.

    The process of putting a clasp to a clay bead bracelet puzzles many people. Both beginners and experienced crafters must focus on patience together with correct techniques to succeed. We will progress through each step together to simplify this process.

    Choosing the Right Clasp for Your Clay Bead Bracelet

    My bead bracelet projects reached new heights when I discovered the importance of selecting the appropriate clasp. Your chosen clasp must both match your bracelet design and maintain a secure fit to ensure your clay bead bracelets function properly.

    Despite the many available choices I suggest using magnetic or lobster clasps. Magnetic and lobster clasps provide a secure closure while remaining easy to attach. It wouldn’t be ideal if your bracelet detached from your wrist during the day.

    Attaching my first clasp to a clay bead bracelet gave me a feeling of achievement as if I had completed the entire piece. The proper choice of clasp transforms the bracelet making experience.

    Tools You Need to Secure a Clay Bead Bracelet Clasp

    The necessity of proper tools became apparent to me when I started attaching clasps to clay bead bracelets. You should have a good pair of pliers ready for securing crimp beads when making clay bead bracelets.

    Apart from the clasp itself which you’ll add later you’ll also need jump rings for the process. Use bead wire to ensure your hold remains secure. Using appropriate tools helps you complete tasks more efficiently.

    I was amazed at how effortlessly crimp beads could secure the beads during my first experience using them. You will gain confidence in your abilities every time you complete a clay bead bracelet that includes a clasp.

    Step by Step Guide to Attaching a Clasp on Clay Beads

    Although it may look complicated to attach a clasp to your clay bead bracelet I assure you it’s simpler than you might think. Thread your beads onto the string or wire first, making sure to leave space for the clasp.

    When you finish threading the beads, add a crimp bead to secure the end. Crimp beads prevent your clay bead bracelet from coming apart. Connect your selected clasp to the bracelet with jump rings.

    Use your pliers to tightly squeeze the crimp bead then you have successfully completed your clay bead bracelet with clasp. The unmatched satisfaction you feel at this point stems from everything finally coming together.

    Tips for Making Sure the Clasp Stays in Place

    Through my experiences I’ve mastered techniques to keep the clasp secure so it won’t fail. Choose a strong closure system when making clay bead bracelets to keep the clasp from failing. To ensure the clasp stays attached I prefer to use two crimp beads together.

    Applying a small amount of jewelry glue will provide additional security for your clasp especially when using a magnetic clasp. I tested multiple methods before discovering this one as the most dependable solution.

    I have complete confidence that my clasp will remain securely fastened. I have full confidence that my bracelet will remain in place throughout the day whenever I wear it.

    Mistakes to Avoid When Securing the Clasp

    Even seasoned jewelry makers make mistakes. To achieve strong closures for clay bead bracelets you need to remember what practices to avoid.

    • Over-tightening the loop 

    The clasp experiences pressure which restricts its motion. Leave a little space in the loop. 

    • Under-crimping the bead 

    A loose crimp connection between the wire and the loop will allow the clasp to detach over time.

    • Skipping crimp covers 

    While not necessary you can use crimp covers to both conceal sharp crimps and give a professional appearance to your piece.

    • Using the wrong clasp size 

    Big clasps overpower dainty bracelets. Always select a clasp that corresponds in size to your beads.

    While every mistake offers a lesson, mastering their avoidance accelerates your path to success.

    How to Choose the Best Clasp for Your Style and Beads

    The process of choosing a clasp should consider both its functionality and aesthetic appeal. The clasp should match the overall design of your clay bead bracelet. Magnetic clasps appeal to me because they look sleek and operate smoothly but lobster clasps provide more secure fastening. 

    Your choice should reflect both the weight of your beads and your individual style preferences. Certain clasps perform better with bulky beads whereas other clasps work best with subtle designs.

    At the beginning of my bracelet-making journey I didn’t understand how much a clasp could alter the bracelet’s appearance. I always make sure to think thoroughly before I select.

    Clay Bead Bracelet Clasp Alternatives for Easy Attachment

    The variety of clasps available today shows that traditional lobster and magnetic clasps are not the only options. For those seeking a boho or rustic aesthetic my experience shows that toggle clasps work excellently.

    They’re also easy to attach and detach. Using a knot can effectively secure your bracelet when you work with thick thread. This technique functions well as a clasp substitute while providing a laid-back appearance.

    Throughout the years I experimented with multiple alternatives which resulted in giving each finished piece its own distinct atmosphere. The joy of working with jewelry often lies in trying out various methods.

    Troubleshooting When Clasping Your Clay Bead Bracelet

    The worst feeling is when you complete your bracelet and find that the clasp fails to function correctly. Keep your spirits up if you find attaching clasps to clay bead bracelets challenging. Ensure your crimp beads are tight enough so they do not become loose.

    When your bracelet clasp does not fit properly because it is too tight or too loose you need to consider replacing it with a new style. I’ve rewired several clasps myself because getting it correct proves worthwhile.

    The feeling of pride washes over me whenever I achieve perfection. The bracelet making process includes steps like attaching clasps to clay bead bracelets.

    Enhancing Your Bracelet Design with Clasp Additions

    My early days of crafting taught me little about how clasps can significantly improve jewelry designs. A clasp serves more than a functional purpose because it acts as a key decorative element.

    Attaching decorative clasps to multiple bracelets consistently improves their appearance. The addition of an elegant clasp turns a basic clay bead bracelet into a remarkable piece of jewelry.

    Using the right clasp transforms the act of putting your bracelet on and taking it off into a luxurious experience. I have learned through experience that the clasp holds equal significance to the beads in a bracelet. Selecting the appropriate clasp gives each design an extra touch of refinement.

    Why a Strong Clasp is Essential for Your Clay Bead Bracelet?

    The strength of your clay bead bracelet’s clasp is essential for its overall functionality. Early on, I failed to recognize the importance of a good clasp which led to constant anxiety about my bracelet slipping off. The correct clasp I discovered keeps all components secure and safe after several tests.

    A dependable clasp like a lobster clasp or a sturdy toggle protects your effort from being lost. Now, I never skip this step. A strong clasp allows me to wear my bracelets with confidence because I don’t need to worry about them breaking off. It’s essential for lasting wearability. 

    Final Thoughts: Trust Your Hands

    The strength of your clay bead bracelet’s clasp is essential for its overall functionality. Early on, I failed to recognize the importance of a good clasp which led to constant anxiety about my bracelet slipping off. The correct clasp I discovered keeps all components secure and safe after several tests.

    A dependable clasp like a lobster clasp or a sturdy toggle protects your effort from being lost. Now, I never skip this step. A strong clasp allows me to wear my bracelets with confidence because I don’t need to worry about them breaking off. It’s essential for lasting wearability. 

    Frequently Asked Questions

    Can you use magnetic clasps on clay bead bracelets?

    Absolutely! Magnetic clasps stand as my primary choice for securing clay bead bracelets. Magnetic clasps readily attach to bracelets providing them with fashionable modern aesthetics. The fundamental technique for wearing and removing the bracelet stands out as its greatest attribute. These clasps provide a delicate elegance that makes them suitable for any event. Choose a magnet that has enough power to keep the beads securely fastened together.

    Which clasp type is best for polymer clay bead bracelets?

    When making polymer clay bead bracelets use durable clasps such as the lobster clasp or toggle clasp for best results. These clasps deliver lasting security to maintain your bracelet together. Both clasp types function excellently since they attach with ease and support heavier or larger beads. A magnetic clasp serves as an excellent option for achieving sleek minimalistic designs.

    What string or wire is best for attaching a clasp to clay beads?

    For string and wire applications I choose beading wire which I find best when it has a nylon coating. This material combines strength and flexibility which makes it ideal for attaching clasps to clay beads. The alternative threads I’ve tested don’t hold up well to the beads’ weight. Using beading wire allows you to feel confident your bracelet will remain secure and long-lasting after you attach the clasp.

    Can beginners easily put a clasp on a clay bead bracelet?

    Yes, absolutely! Initially attaching a clasp made me feel intimidated but it quickly became easy to do. The essential approach involves working at a steady pace while using appropriate tools such as pliers and crimp beads. With a few practice attempts attaching a clasp you’ll perform the task effortlessly. Completing your first bracelet that includes a clasp will give you an immense sense of accomplishment!

    Can you use crimp beads with clay bead bracelets?

    Crimp beads are essential to help keep the clasp secure when making clay bead bracelets. Every bracelet I’ve created has included crimp beads. These tiny components deliver the powerful hold necessary to maintain firm positioning. Secure the wire ends by using the crimp bead after you place the beads onto your wire. A straightforward action plays a crucial role in maintaining the durability of your bracelet.

  • Seal the Style: How to Make a Clay Bead Bracelet with Clasp?

    Seal the Style: How to Make a Clay Bead Bracelet with Clasp?

    The memory of attempting to create my first clay bead bracelet with a clasp stays with me. My hands trembled. The starting point was unknown to me yet I desired to create something with a handmade and meaningful essence. Creating jewelry with your personal touch creates a magical experience. It’s not just a craft. It’s personal.

    Upon successfully crafting a clay bead bracelet with a clasp I experienced feelings of pride. Truly proud. This place is perfect for anyone who dreams of creating jewelry that reflects their personality. Let’s seal the style together.

    Choosing the Perfect Clay Beads for Your Style

    I spent many hours in bead shops during my days exploring various textures and colors by touching them. Finding the right clay beads turned into a deeply personal journey for me.My initial search for clay beads started with earthy tones until I switched to lively beads which matched my playful personality.

    The combination of matte and glossy finishes gave my bracelet its depth. Current design trends show a preference among designers for handmade styles which express natural aesthetics.That made me confident in my picks.

    I wanted my final choice to reflect my personality rather than being overly showy. If you’re starting out, trust your instincts. Your personal taste is reflected in the beads you select because they determine your bracelet’s soul.

    Tools and Materials You’ll Need for Bracelet Making

    • Polymer clay beads
    • Beading wire or nylon cord
    • Crimp beads
    • Crimping tool
    • Lobster, toggle, or magnetic clasp
    • Jump rings
    • Wire cutters
    • Flat-nose pliers
    • Bead stopper (optional)

    The combination of these tools enables you to craft a clay bead bracelet that looks stylish and finishes professionally while remaining secure. Trust me, preparation saves frustration.

    I obtained command over my project when I used the correct tools which helped me calmly carry out my idea.

    Designing a Unique Bead Pattern That Feels Personal

    The pattern creation process delivered the greatest joy throughout my project experience. I arranged the beads on a tray before I rearranged them and allowed my emotions to direct the process. I didn’t follow any strict rules.

    I considered colors which brought me happiness. Every section needed to have a narrative quality. At times I enhanced my work with a touch of gold or a miniature charm. It reflected my personality.

    The current trend toward expression in fashion makes the process of designing your own pattern feel even more meaningful. Your bracelet transforms into an essential piece of your life journey. This small wearable art piece becomes a genuine expression of your personal style and feelings.

    How to String Clay Beads Like a Pro

    It appeared stringing beads was simple until I started to attempt it. I struggled frequently because many holes did not fit the beads well. But I kept going. I held the cord firmly and carefully slid each bead along its length.

    It was calming, almost like meditation. I realized that patience is key. Rushing only caused mistakes. A beading needle made it less difficult to complete the task. I also avoided overloading the cord. It needed to be flexible.

    While my hands started moving with rhythm the bracelet started coming together. Watching each bead bring the bracelet to life gave me great satisfaction. This section of the project taught me how to appreciate crafting by slowing down.

    Adding the Right Jewelry Clasp for a Secure Fit

    I needed to prevent my hard work from collapsing. So, I focused on the clasp. Choosing the right one was essential. I conducted extensive research and tried several alternatives. The magnetic clasp attachment greatly improved the ease of wearing my clay bead bracelet.

    The magnetic clasp clicked into place perfectly while giving the bracelet an elegant appearance. It didn’t overpower the beads. The clasp integration into the design appealed to me.

    My outfits looked better when I paired them with this bracelet style. A small component can dramatically change both how a piece operates and its overall style.

    Tips to Attach Clasps Without Breaking the Cord

    • Use the right cord: When selecting a cord opt for nylon-coated beading wire or durable elastic to achieve better longevity.
    • Don’t overtighten: To avoid tension at the clasp, create a small loop.
    • Use crimp beads properly: The correct tool should be used to gently crimp the cord so that it does not get cut.
    • Double-thread ends: Twice loop the cord around the clasp and crimp bead to achieve reinforced strength.
    • Test before trimming: Test the clasp’s hold by pulling gently before trimming any extra cord.
    • Avoid cheap tools: High-quality pliers help avoid accidental cord crushing or slipping during use.

    Knotting Techniques That Keep Everything in Place

    The knotting process felt difficult initially which led me to keep practicing. I watched multiple video tutorials and tested different knotting techniques. I found the surgeon’s knot to be the best method for me. It held tightly without looking bulky. Once I pulled it tight I fortified it with an additional coating of glue. That made it feel extra secure.

    For clay bead bracelets to achieve a professional and long-lasting finish this step is essential. It’s worth spending the extra time. My former rushing approach has shifted to a careful treatment during this step. A well-tied knot gives your bracelet both a finished appearance and a sense of reliability.

    Testing the Bracelet for Comfort and Strength

    I tested my bracelet throughout the house for an hour before declaring it finished. I checked how it felt. It didn’t tug or slip. Gently twisting the bracelet I tested the clasp function. That’s when I felt confident.

    The completion of clay bead bracelets with clasps requires ample time to prevent rushed work. A loose fit may appear acceptable but lacks durability. I constantly check both sharp edges and the tightness of knots in my work.

    I test the durability of my bracelet by splashing water on it. Through my method I ensure my bracelet is prepared for daily use and maintains a comfortable look.

    Styling Your Handmade Beaded Bracelet with Outfits

    After wearing my bracelet to public places I received numerous compliments. It added color to my neutral clothes. I matched my bracelet with denim clothes one day followed by a floral dress the next.

    The handmade jewelry currently offers a fresh and expressive touch to any outfit. I love how versatile it is. Metal bangles become part of my stacking routine with this necklace. Current trends highlight the combination of handmade pieces with classic fashion staples.

    Your bracelet becomes a signature. Making these pieces stands out as my favorite activity. This method allows you to transport your creative spirit to all the places you visit. No other accessory gives me the same sense of style and confidence.

    Gifting and Selling Your Custom Clay Bead Bracelets

    Upon completing several bracelets I began presenting them as gifts to my friends. Their reactions warmed my heart. Then someone asked to buy one. That surprised me. I came to understand that handcrafted items with emotional significance capture people’s appreciation.

    After that I made several more items and posted them online. Selling them felt exciting, but meaningful. I included a small note along with each piece I created. You should definitely pursue turning this activity into a side business.

    There’s a growing love for handcrafted accessories. The unique narrative behind every bracelet along with your handmade process brings special meaning to each piece. Such beauty deserves to be showcased to everyone.

    Bringing It All Together with Heart and Style

    The process of making a bracelet from beginning to end provided benefits that went beyond the final jewelry product. It gave me confidence and peace. Each time I wear the bracelet it triggers memories of the meticulous dedication I invested in every individual bead and knot. 

    I learned patience and creative expression through the process of making a clay bead bracelet with a clasp. When you first start making bracelets remember that mistakes are part of the learning process.

    Every slip adds to your story. The love you put into your work becomes evident regardless of whether you’re making something for yourself or for others. Find your signature look by creating something from your own hands and heart. It’s truly worth it.

    Frequently Asked Question

    What thread is best for making clay bead bracelets with a clasp?

    The stretchy elastic cord provides excellent comfort and functionality based on my personal experience. When working with a clasp opt for strong beading wire or waxed nylon thread. It holds shape well and resists fraying. After using both materials I can clearly see their durability levels differ. Your choice of thread must fit through your bead holes without any resistance. That small detail saves big frustration later. 

    Should I use crimp beads on clay bead bracelets?

    Initially I skipped crimp beads, but they enhance the security of finishes effectively. When clasps are involved they securely maintain thread tension. Just be gentle when pressing them down. I once applied too much pressure to a crimp bead which resulted in the thread becoming damaged. After practicing with crimp beads I started loving them as one of my favorite finishing touches. They make everything look neat and polished. 

    How to prevent clay bead bracelets from breaking at the clasp?

    During my initial experience this occurred which left me feeling heartbroken. The knot holds significant importance in this process. First tie a second knot then apply glue to secure it. I make sure not to pull the clasp too tightly during attachment. Gently tugging on the bracelet before wearing it works well for testing its durability. Following those extra procedures resulted in both peace of mind and improved outcomes for me.

    Should you use crimp beads when finishing a clay bead bracelet?

    Choose this method for achieving a polished and durable finish. When I first used crimp beads the process seemed complicated. After practicing with crimp beads my bracelets began to look quite professional. Achieving an elegant shop-quality appearance becomes easier when you follow this advice. Select the appropriate crimp size that corresponds to your thread. That really makes a difference. 

    Can I use magnetic clasps for clay bead bracelets?

    Yes, and honestly, I love them. Including a magnetic closure on the clay bead bracelet made putting it on and taking it off effortless. No more fumbling with tiny hooks. One hand was enough to snap it into position. Plus, it looked elegant. Choose a magnet that maintains its strength when worn daily. I checked the magnetic clasp before wearing my bracelet and it has performed flawlessly since then.

  • Wrist-Ready Wonders | How to Make a Bead Bracelet with Clasp?

    Wrist-Ready Wonders | How to Make a Bead Bracelet with Clasp?

    Making a bead bracelet with a clasp results in one of the most fulfilling artistic activities anyone can experience. I remember the decision I made to create my first bead bracelet which included a clasp. In that instant creativity merged flawlessly with craftsmanship.

    I felt deeply fulfilled when I wore a piece of jewelry that I made myself. Making bracelets is easy and enjoyable for beginners as well as those who practice this craft occasionally.

    The true beauty of a beaded bracelet emerges from both its appearance and the personal touch each crafter bestows upon it. Get ready to learn the steps needed to create your own wrist-ready wonder and let’s get started!

    Why Choose Bead Bracelets for Your Wrist Style?

    At the beginning of my journey making bead bracelets I was unaware of their ability to enhance my personal style. Beaded bracelets with secure clasps transcend their accessory role to become powerful personal statements.

    These bracelets stand out because they are adaptable to any event or emotional state. These bracelets work perfectly for both relaxed and formal events because of their adaptability. Every bracelet represents a personal style extension.

    The steps in a beaded bracelet making guide will reveal to you just how simple it can be to produce jewelry that expresses your individual style. After trying one of these bracelets you’ll find yourself unwilling to remove it.

    Essential Tools to Create Bead Bracelets with Clasp

    The day I collected all the necessary materials for making beaded bracelets stands out in my memory. The moment I started working on beaded bracelets felt like launching into an exciting new venture. You need only basic tools without expensive equipment to get started.

    For beading bracelets, I suggest using a pair of pliers alongside a bead board and premium thread or wire. To complete your bracelet project securely you will need clasps. My work began with the revelation that possessing proper tools proved essential.

    Choosing the right clasp keeps your bracelet secure while high-quality beading thread connects all elements together beautifully. It’s all about the details. 

    Step-by-Step Guide to Bead Bracelet Making

    1. Choose Your Design

    Decide the style – minimalist, boho, or glam. Sketch it if needed.

    2. Pick the Right Beads

    Choose beads from glass, gemstone wood or plastic to express your personality and style through your choice.

    3. Gather Materials

    Your bracelet creation begins when you gather elastic or wire paired with crimp beads and pliers along with a clasp. Constructing a beaded bracelet requires a secure clasp.

    4. Measure Your Wrist

    You need a measuring tape or a piece of string to take your wrist measurement. Add half an inch for comfort.

    5. Cut the Stringing Material

    Give yourself a few extra inches. Better to have more than not enough.

    6. String the Beads

    Arrange them first. Follow your planned arrangement to thread each bead onto the string one at a time.

    7. Add Clasp and Crimp Beads

    Crimp beads help fasten the clasp securely. Use pliers to flatten them into place.

    8. Test the Fit

    Try it on before finalizing the ends. Adjust the bracelet’s fit whenever it feels too loose or too tight when trying it on.

    9. Secure the Ends

    Ensure the clasp is tightly attached. You want your bracelet to last.

    10. Trim Excess and Polish

    Remove any surplus wire from your bracelet while performing a detailed inspection for sharp edges.

    How to Add a Clasp to Your Beaded Creation?

    The clasp needs to be fastened last to finish your beaded bracelet. Initially I struggled with this step but now it feels completely natural to me. I select a clasp that offers strong security while remaining user-friendly in operation.

    When you use a secure clasp on your beaded bracelet you can be sure that it remains intact while you wear it all day. My go-to choice is magnetic clasps since they are user-friendly but lobster claws create a classic appearance.

    You can attach the clasp by using pliers to connect the thread or wire ends to it. Adding the final clasp ensures your bracelet becomes functional and wearable which completes your artistic creation.

    Tips for Perfectly Secure Bracelet Fastening

    Bracelet creation requires special attention to the strength and durability of its fastening system. My experiences with unreliable clasps brought frustration but I found valuable tips through years of practice.

    Before attaching the clasp, ensure your thread is tightly woven and thoroughly checked. Before wearing my bracelet I always check that the clasp holds properly for security. The success of your bracelet relies heavily on selecting a strong beading thread.

    The most effective materials for cords are nylon and silk. Attaching a crimp bead and using double knots on the ends will provide extra assurance that your bracelet remains secure.

    Adding Personal Touches to Your Bead Bracelet

    Adding personal touches makes a beaded bracelet truly special. I enjoy making my bracelets reflect my current mood or the season along with special occasions. Each bead becomes a story when you add charms, mix in favorite gemstones, or incorporate special colors.

    When I incorporate these small elements my bracelet feels truly personal to me. My beaded creations frequently feature family heirloom beads or gemstones that carry sentimental importance.

    The personal touches you add create the beauty of bracelet making because they make the piece belong only to you. This bracelet serves as a beautiful demonstration of creative and personal expression.

    Common Mistakes to Avoid in Bracelet Making

    During my first attempts at making bead bracelets I encountered numerous mistakes. I made a major mistake by failing to double-check my clasp for security. The greatest frustration comes from putting hours into bracelet-making when it ends up falling apart.

    My choice of thread was incorrect because I didn’t select the right material. I failed to understand how crucial material selection is for achieving product durability. You should avoid rushing through the design process.

    Creating something you love for many years requires patience and taking your time. The small elements you focus on now will have big impacts on your future results.

    Care and Maintenance for Beaded Bracelets

    After creating your lovely bead bracelet you should focus on making sure it stands the test of time. Through experience I discovered that proper bracelet care maintains its longevity. To protect your bracelet from damage, put it in either a soft cloth or jewelry box for storage.

    For cleaning purposes I gently wipe any dirt or oils away using a soft cloth. Avoid saturating your bracelet because excess moisture can damage its thread and clasps. Regular maintenance is simple but essential. A little extra attention to your bracelet maintenance will help maintain its beauty over the years.

    Where to Wear Your Beautiful Bead Bracelet

    Each time I put on my beaded jewelry I feel overwhelming pride. The secure-clasp beaded bracelet excels at both formal events and casual meetups. The moment I select my outfits they gain elevated elegance and become impressive statement pieces for evening outings. 

    When paired with additional jewelry pieces they form a stunning layered appearance. Your bracelet ensures that every journey to work or special event includes your unique personal touch. Bead bracelets provide versatile style options that fit perfectly with almost every type of event.

    Trending Styles for Bead Bracelets with Clasps

    Bead bracelets maintain their timeless appeal because they never become outdated. Bead bracelets with clasps are currently experiencing a large surge in popularity. The current fashion trend features minimalist bead bracelets with basic beads paired with gold or silver clasps.

    Bold and colorful designs are making their way back into fashion. Many people today combine wood, metal and gemstones to craft distinctive pieces that stand out. A major advantage of these bracelets lies in their ability to match your personal fashion preference.

    You can find the perfect bead bracelet trend that matches your style preferences from subtle elegance to eclectic designs.

    The Healing Power of Bead Bracelets with Clasp

    I have always cherished bead bracelets because they connect with healing energy. A large number of individuals including myself make their gemstone choices based on their therapeutic properties.

    Amethyst functions to calm mental activity while turquoise works to assist in healing processes. When I design beaded bracelets with secure clasps I select stones because they offer both visual appeal and functional healing properties.

    When I wear these bracelets the stones seem to channel their energy into me making me feel powerful. Simple things have surprising power to infuse your life with positive energy. Numerous people find genuine healing benefits from wearing these bracelets.

    DIY Bead Bracelet Ideas for Beginners and Experts

    Beginners and experienced crafters alike can find many opportunities to explore new techniques and designs in bead bracelet making. Experimenting with new materials and techniques brings me joy while my learning journey continuously expands.

    Beginners should start their bracelet projects with basic patterns using big beads and a reliable clasp for better handling. When you build your confidence you can start creating with smaller beads and explore various clasps and advanced techniques.

    I have witnessed people produce intricate designs which serve as reflections of their personal character. New DIY beaded bracelet ideas exist for both beginners and experienced crafters to explore and enjoy.

    Final Thoughts

    Crafting a beaded bracelet with a clasp offers both creative fulfillment and enjoyment as a hobby. If you have suitable materials and understand the steps you can successfully make it.

    This beaded bracelet making guide is your initial resource to help you create professional-quality unique accessories. Try out different beads and finishing techniques to perfect your bead bracelet design style.

    The bracelets you create provide your wardrobe with individualized style. Is your creative spirit prepared to dive into bracelet making?

    Frequently Asked Question

    What is the best thread or wire for bead bracelets?

    My hands-on experience shows that nylon thread for beading wire works best when making bead bracelets. Between nylon thread and beading wire I have experience with both materials yet I choose beading wire because it provides superior strength and longevity. This material maintains its integrity well over lengthy periods when working with larger beads. Nylon thread provides superior softness and flexibility that makes it ideal for securing smaller and lighter beads. I enhance security by double knotting the ends and using crimp beads. Your design requires the right choice that ensures lasting strength.

    What are the best clasps for handmade beaded bracelet?

    Among clasps I suggest lobster clasps because they offer dependable performance with a timeless style. The clasps maintain their durability while providing straightforward handling and multiple finish options to blend with your beads. Choose magnetic clasps if you want a fast and easy way to secure your jewelry. Toggle clasps provide a stylish yet functional option for securing bracelets. You should select a clasp which both matches your bracelet design and maintains a secure fit.

    Can beginners make beaded bracelets with clasps easily?

    Absolutely! When I first began making beaded bracelets with clasps I felt a sense of accomplishment. It’s easier than you might think. First create basic patterns and concentrate on mastering the secure attachment of clasps. Following a beaded bracelet making guide demonstrates how fast you can create your own bracelet. Through patient practice the process becomes intuitive enabling you to confidently create beautiful personalized pieces.

    Can I use elastic instead of wire for clasped bead bracelets?

    Yes, you can use elastic! On multiple occasions I’ve used elastic to achieve both flexibility and comfort in my designs. Bracelets without clasps work best with elastic but you can add a clasp for better security. Elastic material lacks the long-term durability that wire provides. Elastic stretches as time passes so ensure you replace it once you notice wear and tear. Elastic remains an excellent choice for stretchable designs that are effortless to wear.

    Can magnetic clasps be used for heavy beaded bracelets?

    Magnetic clasps provide excellent usability although they require careful consideration when used in heavy beaded bracelets. While magnetic clasps work well for medium-weight designs I’ve experimented with, heavier beads require a more reliable closure option. Heavy pressure can cause magnetic clasps to fail to hold their position effectively. A lobster clasp or toggle clasp should be your choice when working with large or heavy beads to maintain secure bracelet positioning all day.

  • How to Make a Seed Bead Bracelet with Clasp Attachments?

    How to Make a Seed Bead Bracelet with Clasp Attachments?

    Crafting a seed bead bracelet with clasp attachments stands as one of the most fulfilling do-it-yourself projects. My initial seed bead bracelet creation became magical as I observed how small beads transformed into a stunning piece.

    The best part? You transform your designs into unique personal masterpieces through customization. Creating a seed bead bracelet with a clasp develops your artistic talents and brings personal satisfaction since you love to enhance your accessories with special features.

    You can design your own bracelet through this simple process which employs these easy-to-use yet striking details.

    Gather Your Materials and Tools

    Prepare all your materials before beginning to make a bracelet with seed beads. A clutter-free workspace is key. 

    • Seed Beads – Choose size 11/0 for beginners. The beads are simple to work with while producing stunning patterns.
    • Nymo thread along with FireLine and WildFire make excellent thread choices. Strong and flexible. 
    • Beading Needle – Thin needles are a must. Seed beads fit best with needles that are size 10 or size 12.
    • Select lobster claw clasps, toggle clasps, or magnetic clasps because they offer easy usage.
    • Your bracelet looks more professional when you use scissors or thread snips for clean cuts.
    • A Bead Mat or Tray keeps your beads in place and maintains organization during your work.

    Beading beginners will find the process becomes much easier with these tools.

    Choosing the Right Seed Beads for Your Design

    The choice of beads you pick determines whether your design succeeds or fails. It became clear to me early on that seed beads vary in quality and type. The appearance of your bracelet will change according to the bead size and color selection.

    Use various colors to enhance your design but select beads of the same size to simplify the weaving process. Beginners who explore various beading techniques should try out multiple beads shapes and finishes.

    I prefer using matte or frosted beads because they provide a subtle yet sophisticated appearance. The initial phase of developing a unique piece begins with selecting beads that reflect your personal style.

    Picking the Perfect Clasp for Your Bracelet

    The clasp seems unimportant but actually determines the bracelet’s full look. The search for the right clasp hindered my progress during my initial seed bead project which led to frustration. A reliable clasp ensures your seed bead bracelet stays secure while adding an elegant touch to its design.

    You can choose between lobster clasps, toggle clasps and magnetic closures to match your particular design preferences. Magnetic clasps work better for beginners because they are simpler to handle. Choose a clasp that matches your bracelet style and take time to find the perfect one.

    How to Thread Seed Beads onto String or Wire

    The process of threading seed beads onto wire or string stands out as one of the most enjoyable tasks when creating bracelets. The process initially challenged me but after discovering my rhythm I found it became natural. You should use a beading needle to thread seed beads when constructing a bracelet with thread.

    The process becomes straightforward and seamless through this method. I like using nylon thread because it combines strength with flexibility but wire serves as a better option for additional sturdiness. Thread the beads at your own pace and avoid hurrying through the process. Greater patience results in a more exquisite finished bracelet.

    Creating the Pattern for Your Seed Bead Bracelet

    The process of designing a bracelet pattern represents the moment your creative skills shine through. Both following established techniques and developing unique methods require a process of trial and error. I begin by drawing my ideas to understand how the beads will connect in sequence.

    Beginners should start learning beading techniques with basic patterns. You can explore different patterns using straight rows and curves while adding small accent beads to enhance the design. Your personal style will shine through the beautiful jewelry piece you create by using your creativity and patience.

    Attaching the Clasp with Secure Knotting Techniques

    Attaching the clasp stands as one of the most essential steps in the creation of seed bead bracelets. The use of strong knotting methods is essential to maintain the structural integrity of the bracelet. Making knots stronger requires doubling the thread used during the tying process.

    Seed bead bracelets both function effectively and appear stylish when they have a dependable clasp. Select between a basic knot or an advanced technique based on your knot-tying expertise.

    After securing the knot you need to trim the remaining thread carefully to prevent fraying. The process involves some difficulty but becomes straightforward as you practice.

    Final Touches to Complete Your Seed Bead Bracelet

    After stringing your beads and securing the clasp you should proceed to the finishing steps. The moment when the bracelet begins to feel like a complete item represents my favorite part of the process. The bracelet receives my inspection to confirm its correct fit and secure clasp.

    To achieve the desired bracelet length simply add more beads or take some away. To make the bracelet uniquely mine I add a small charm or bead at its end. A few simple adjustments will prepare your bracelet to become a beautiful accessory for yourself or a thoughtful gift.

    Tips for Customizing Your Seed Bead Bracelet Design

    When you personalize your design you get to add your own unique touch which is the most enjoyable aspect. By designing patterns and mixing bead sizes or by adding charms you can personalize your creation.

    My bracelet designs featured specific colors that matched certain outfits and events which turned each piece into something unique. The design becomes more sophisticated when you incorporate small decorative pieces such as crystals or gold beads.

    Using various bead finishes will help you achieve textured designs with added depth. The seed bead bracelet guide should push you to go beyond traditional designs and discover various creative options. This craft stands out because of the extensive personalization opportunities it offers.

    Troubleshooting Common Bead Weaving Challenges

    Weaving can be frustrating at times yet it serves as an important element of the learning journey. I often encountered uneven tension as a recurring difficulty during the seed bead bracelet making process with clasps.

    Tight thread causes beads to move in an uneven manner. A bracelet becomes delicate when the thread tension is insufficient. I prevent uneven tension by periodically examining my progress and making necessary changes.

    The task of keeping beads free from tangles and blockages presents yet another challenge during the bracelet-making process. You should use a beading mat to ensure all beads stay where they should. These small hurdles turn much easier to manage as you demonstrate patience over time.

    Caring for Your Seed Bead Bracelet to Keep It Lasting

    Maintaining your seed bead bracelet holds equal importance to the process of creating it. My first bracelet creation became tangled and lost its luster which taught me an important lesson. I make sure to clean my bracelet using a soft cloth after every use.

    To protect your jewelry from damage keep it dry and store it in a box or pouch. I prevent wearing my bracelet in situations where it might become snagged or scratched. If you maintain your bracelet properly it will endure through many years and serve as a memory of your original craftsmanship.

    Explore Unique Clasp Variations for Seed Bead Bracelets

    The process of making a seed bead bracelet becomes enjoyable through the exploration of diverse clasp options. The number of choices available left me in awe. All clasp types present distinct aesthetics and functionalities.

    To achieve a sophisticated and detailed look, consider using either a box clasp or a clasp embellished with decorative elements. Magnetic clasps provide effortless convenience for users who seek simplicity in their closure choice.

    Choose whichever clasp seems right to you but ensure it matches your design concept. Trying out different types of clasps brings added creative possibilities to your bracelet-making experience.

    Why Seed Bead Bracelets Make Great Personalized Gifts

    Seed bead bracelets create wonderful presents because they provide a personal connection which mass-produced jewelry lacks. I find joy in giving these handmade bracelets to my friends and family because I know they will cherish jewelry made uniquely for them.

    The best part? Each bracelet design can be adjusted to reflect the recipient’s personal style and personality. When bracelets display their favorite color or stand-alone patterns they transform into one-of-a-kind presents.

    The time and effort needed to craft a seed bead bracelet with clasp earns people’s gratitude. This gift reveals your caring nature by showcasing thoughtful planning.

    Common Mistakes Beginners Make

    Avoid these pitfalls as you practice. 

    • Excessive tension during threading creates stiffness and warping in the bracelet.
    • If you estimate length without measuring you will end up with an ill-fitting bracelet.
    • If you use incorrect thread it will easily fray or snap.
    • A single pass won’t reinforce the clasp effectively; instead, perform two to three passes.
    • Unbalanced color schemes lead to poor aesthetics that can ruin an otherwise well-made bracelet.

    Mistakes are normal. The key step is to use mistakes to advance your crafting skills.

    Final Thoughts: Enjoy the Creative Process

    Mastering the craft of creating seed bead bracelets that feature clasps allows you to develop both fulfillment and creativity through this skill. Creating handmade items provides satisfaction regardless of whether you wear them or give them as gifts.

    This seed bead bracelet guide provides every beginner-friendly step required for you to succeed. Begin with basic designs and maintain your patience while allowing your imagination to guide your progress.

    Frequently Asked Question

    Which thread is best for seed bead bracelets?

    After beginning my seed bead bracelet-making journey I discovered that nylon or polyester thread produces superior results. The material demonstrates both strength and flexibility which results in smooth threading processes and robust designs. Nylon thread remains my preferred choice because it maintains its structure without fraying and shows good longevity. Choose a thread size that corresponds with your beads to prevent uneven spaces and tension problems.

    How long should a seed bead bracelet be for a comfortable fit?

    I create seed bead bracelets that measure between 7 and 8 inches in length to ensure they fit comfortably. That’s an average size for most wrists. Always measure your wrist first to guarantee a perfect fit when crafting. Measuring your wrist before starting helps you save time and prevent mistakes because you can adjust the length by adding or removing beads.

    Which clasps are most durable for seed bead jewelry?

    After experimenting with different types of clasps I discovered that toggle and lobster clasps stand out as the most reliable options for seed bead bracelets. These clasps offer reliable strength while remaining simple to handle in jewelry making. I choose metal-based clasps because they tend to outlast their plastic counterparts. The strength of a clasp determines how securely your bracelet will remain attached over time.

    What are common mistakes to avoid when attaching clasps to seed bead bracelets?

    During the initial stages of attaching clasps to my bracelets I frequently failed to secure the knots sufficiently. The clasp will eventually become loose if the knots are not properly secured. Trimming excess thread too close to the knot can cause it to unravel. To secure your clasp properly, tie multiple knots and leave a small length of thread before cutting away the excess.

  • How to Attach a Magnetic Clasp to a Bracelet? | Easy Steps

    How to Attach a Magnetic Clasp to a Bracelet? | Easy Steps

    The memory of my first attempt at attaching a magnetic clasp to a bracelet stands out in my mind. I was nervous and unsure. I struggled to handle the small components and thought about quitting. Achieving success brought me an overwhelming feeling of pure joy.

    When I finally achieved success, I experienced an overwhelming sense of happiness. This new skill unlocked my entire jewelry-making potential. The moment I mastered attaching a magnetic clasp to a bracelet transformed my approach to jewelry-making.

    The addition of a magnetic clasp made my handmade jewelry look both polished and professional. This solution will help you overcome your past difficulties with closures. I will show you the easy steps that helped me make wearable art pieces successfully.

    Why Magnetic Clasps Make Bracelet Life Easier?

    Traditional clasps proved to be a major obstacle for me during my initial jewelry making attempts. They were frustrating, often slipping or breaking. The discovery of magnetic clasps revolutionized my jewelry making experience.

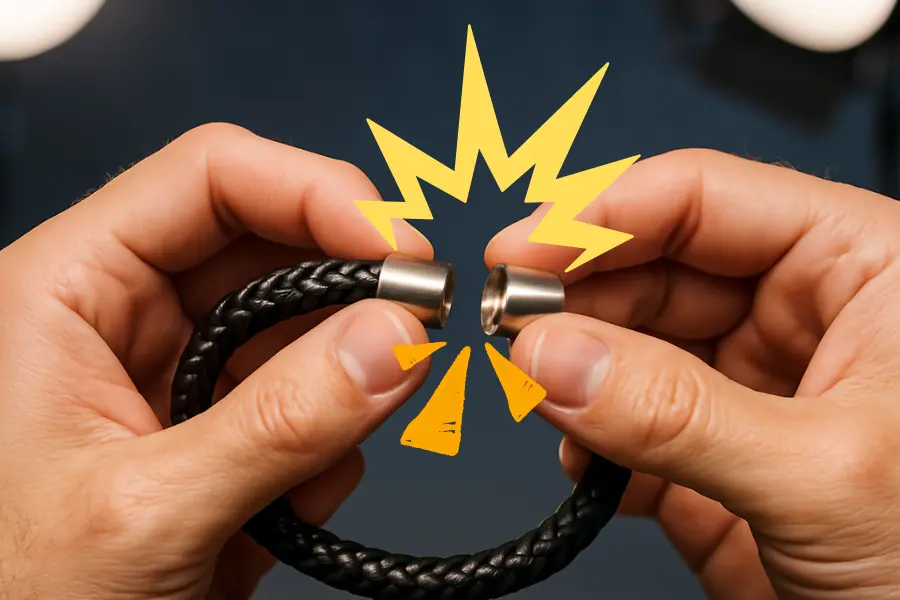
    I found life simpler once I had access to a magnetic clasp fitting guide. These clasps operate securely while providing ease of use alongside their sleek appearance suitable for any bracelet. These clasps make it easier to wear and remove jewelry.

    After mastering the installation of magnetic clasps on bracelets I didn’t need to explore any other options. These clasps deliver an ideal mix of practicality together with aesthetic appeal. This effortless fix transforms any jewelry item into something special.

    Choosing the Right Magnetic Fastener for Your Style

    Choosing an appropriate magnetic fastener ensures your bracelet design turns out successful. I have selected magnetic fasteners that lacked sufficient strength or didn’t align with my design preferences. Through my experiences I have developed an understanding of how to balance beauty and strength in my designs.

    A wide range of magnetic fasteners exists which features both simple minimalistic designs and elaborate styles. You’ll also want a clasp with enough power to securely hold the bracelet. After trying a few, I found one that fit perfectly with my designs.

    The magnetic clasp connection method I use now ensures both strength and style. Once you find the right clasp, your bracelet will shine even more.

    Tools You Need to Secure a Magnetic Clasp

    I check that I have all the necessary tools prior to beginning the bracelet clasp installation process. To successfully attach a bracelet clasp you must use a pair of jewelry pliers. Proper alignment requires glue and crimp beads along with a measuring tape. The prepared tools I gathered made attaching the magnetic clasp much simpler during my initial attempt.

    The simplicity of the procedure astonished me once I had all the materials ready. When using these tools you’ll feel as though the task becomes second nature. Getting everything ready beforehand turns the process into a smooth and easy task.

    Measuring Your Bracelet for a Perfect Fit

    Measuring your bracelet correctly before starting is crucial, and I learned that the hard way. I’ve had moments when my clasp wouldn’t fit, or the bracelet was too tight. Now, I measure my wrist and add an extra inch for comfort. Being prepared with these tools greatly simplified my first experience with attaching a magnetic clasp.

    Once I organized all the necessary materials I needed to work with the bracelet clasp installation process became incredibly straightforward. The availability of these tools allowed me to perform the task naturally. Being prepared makes the entire process run seamlessly without any issues.

    Preparing Bracelet Ends for Clasp Attachment

    I initially underestimated the significance of properly finishing the bracelet ends because it is a minor yet crucial step in the process. The ends must be tidy and prepared to attach the clasp. To achieve a neat finish I always cut away any surplus cord or thread from the ends. Crimp beads serve to stabilize the bracelet ends before I attach the clasp.

    The process may appear time-consuming yet it leads to a more efficient clasp attachment experience. My initial attempt ended poorly because I neglected to properly prepare the ends. My experience shows that a properly prepared end serves as the base for a bracelet that stays secure and durable.

    How to Attach Magnetic Clasp to Leather Bracelet

    Now it’s time to assemble your bracelet. Take your time to move through each step carefully at your preferred speed.

    Step 1: Apply Glue to the Leather Tip

    Place a small amount of glue onto your leather’s tip. Spread it evenly.

    Step 2: Insert Into One Side of Clasp

    Place the leather tip with adhesive into the clasp opening. Align it straight and push in firmly.

    Step 3: Hold and Press

    Maintain the leather’s position for an entire minute to ensure proper adhesion. Press with steady pressure for best results.

    Step 4: Repeat on Other Side

    Use the same technique to connect the second leather end to the unused side of the clasp.

    Step 5: Let It Cure for 24 Hours

    Don’t touch or test the clasp. Your bracelet needs to dry completely before setting, which requires a full 24-hour duration.

    Securing the Clasp Using Glue or Crimp Beads

    Glue initially served as my solution to secure clasps until I discovered that crimp beads provided superior stability. The use of jewelry glue followed by a crimp bead attachment guaranteed that the clasp remained secure and did not detach. I use pliers to carefully make sure the crimp bead is snug after fastening the clasp.

    This method provides assurance that my bracelet will remain secure. Although I initially doubted their effectiveness, crimp beads ultimately became my preferred choice for securing clasps. All of my handmade bracelets now exhibit a professional and sturdy finish.

    Testing the Strength of Your Magnetic Lock

    I make sure to check my bracelet’s magnetic lock strength before putting it on. No situation feels worse than doubting if your clasp will remain secure. I examine the bracelet’s magnetic strength by gently pulling it apart to see if the magnet remains secure. I discovered the magnetic clasp’s power when I first tested it.

    It was much stronger than I expected. Since I started checking the magnetic clasp my bracelet has never come undone. I feel confident in wearing my bracelet because testing the lock always gives me peace of mind. This method provides a fast and effortless way to make sure your creation remains both safe and secure.

    Fixing Common Magnetic Clasp Mistakes

    I’ve learned valuable lessons from making numerous mistakes in the process of attaching magnetic clasps. My frequent problem was wearing the bracelet before the glue had completely dried. The clasps fell off without warning. My bracelet suffered from an improperly sized clasp which lacked adequate strength for its dimensions.

    My retrospective view shows I should have focused more on selecting the correct magnetic fastener along with giving enough bonding time. The reliability of my finished pieces increased significantly as I enhanced my crafting method by correcting these mistakes. It’s all part of the learning journey.

    Styling Your Bracelet After Clasp Installation

    The bracelet becomes fun to style once I secure the clasp. I pair magnetic clasp bracelets with different jewelry items to create a unique style. The clasp provides a fashionable yet subtle touch that enhances both my everyday outfits and formal wear.  The fitting guide for magnetic clasps enabled me to learn the art of achieving balanced jewelry designs.

    Once I secure the clasp in place my bracelet becomes a complete statement accessory. A tiny finishing touch has the power to completely transform the appearance of your jewelry piece. The perfect clasp transforms the total appearance of your jewelry piece.

    Caring for Bracelets with Magnetic Closures

    Bracelets with magnetic closures require minimal maintenance but still deserve some attention to protect their clasps. I store my bracelet in either a soft pouch or jewelry box to prevent scratches. Once my bracelet comes off I examine the clasp for any dirt or oils which could interfere with its magnetic properties while cleaning it with care.

    Mastering proper maintenance techniques extended the durability of my magnetic bracelet’s clasp. Through regular maintenance your bracelet will retain its appearance and operational reliability for many years.

    When to Replace a Magnetic Jewelry Clasp

    The need to replace a magnetic clasp arises multiple times when the magnet begins to lose its power. When you realize the clasp isn’t secure as well as before it should be replaced. Magnetic clasps offer strong durability yet they will eventually fail from wear and tear.

    I immediately replace the clasp whenever it feels weak. Installing a new clasp restores a dependable connection which makes your bracelet feel like new again. Clasp replacement is quick and provides reassurance through restored security.

    Conclusion

    You can easily attach a magnetic clasp to a bracelet without any difficulty. You can make professional-quality jewelry which combines style with security through practice with basic tools under proper guidance.

    Throughout my journey I’ve shared all my knowledge about magnetic clasps which includes selecting the correct one and evaluating its durability. The essential elements for success are patience together with attention to detail.

    When you reach proficiency with this technique you will have complete confidence in making bracelets that exhibit both outstanding aesthetics and perfect functionality. Give it a try because you’re only one magnetic clasp away from your new favorite bracelet.

    Frequently Asked Questions

    Is it difficult to attach a magnetic clasp to a bracelet?

    Not at all! The process appeared complex initially until I became familiar with it and found it was actually easy. The key to success involves moving through each step methodically at your own pace. If you have the appropriate tools and patience you will soon master attaching magnetic clasps effortlessly. This easy method dramatically changes the appearance of your bracelet.

    Can magnetic clasps be used for heavy or chunky bracelets?

    Yes, they can! You should select a durable high-quality magnetic clasp that can support the weight. Chunky designs have worked really well when I used these clasps. Choose a magnetic clasp with sufficient durability to match the thickness of your bracelet.

    How much glue should I use when attaching a magnetic clasp?

    I apply only a minimal amount of glue whenever I use it. Excessive glue results in a mess and a weaker connection. A tiny amount of glue will securely hold the clasp in position during the setting process. You need to discover the exact amount of glue that will work without overpowering the joint.

    Do magnetic clasps hold securely for daily wear?

    Absolutely! I wear my magnetic clasp bracelets every day and they always perform perfectly. The magnets demonstrate unexpected strength and remain secure if installed correctly. Even though I wear my magnetic clasp bracelets daily they never come undone. They’re perfect for both style and security. 

    What are the common mistakes when installing a magnetic clasp?

    My initial error was failing to allow the adhesive sufficient time to cure. It caused a few clasps to loosen. A frequent error occurs when people select a clasp that cannot support the bracelet’s weight. Always check the clasp operates correctly before you wear the bracelet so you don’t encounter unexpected problems.

  • How to Attach Magnetic Clasp to Leather Bracelets That Last?

    How to Attach Magnetic Clasp to Leather Bracelets That Last?

    The moment I attempted to attach magnetic clasp to leather bracelets stands out in my memory. It felt impossible. The leather kept slipping. The clasp wouldn’t stay put. I nearly gave up. I wanted to achieve a neat and professional-quality finish for my project.

    I wanted to make sure the bracelet would stay intact for more than just a week. Mastering the technique of attaching a magnetic clasp to a leather bracelet transformed my entire crafting experience.

    Attaching magnetic clasps to leather bracelets made my DIY projects look more refined. The attachment method provided the bracelet with security and style while also making it strong. For anyone who shares my frustration this guide will provide exactly what you need to ensure your work lasts.

    How to Attach Magnetic Clasp to Leather Bracelet

    Now it’s time to assemble your bracelet. At your own speed carefully complete each step of the process.

    Step 1: Apply Glue to the Leather Tip

    Attach a bit of adhesive to the leather tip before moving forward. Spread it evenly.

    Step 2: Insert Into One Side of Clasp

    Move the adhesive-covered leather end into the clasp opening space. Align it straight and push in firmly.

    Step 3: Hold and Press

    Maintain pressure on the leather for a duration of 60 seconds. Press with steady pressure for best results.

    Step 4: Repeat on Other Side

    After completing the first step apply the same procedure to the second leather end so it attaches to the other side of the clasp.

    Step 5: Let It Cure for 24 Hours

    Don’t touch or test the clasp. The bracelet needs a full day to dry and harden properly.

    Choosing the Right Clasp for Leather Bracelets

    I began creating bracelets without understanding how important different clasp sizes were. Some were too bulky. Others kept slipping. I discovered that clasp size needs to correspond with both the bracelet’s width and intended use.

    The clasp you select for a daily wear bracelet must withstand movement. Lightweight clasps worked best with thin leather bands while sturdier clasps were ideal for bold cuffs.

    While testing magnetic bracelet clasps I discovered my preferred design. It locked well and looked refined. The final piece gained a sense of completeness and security from that effortless click.

    Tools You Need for a Strong Magnetic Connection

    My initial belief was that gluing would be sufficient for attaching a clasp. I was so wrong. A solid bracelet needs more than hope. Scissors, jewelry pliers, and leather cement remain within reach at all times.

    When tools are tailored to tasks they enable precise fitting and extended durability. I always begin by measuring and cutting the ends neatly before starting any project. Assembling magnetic clasp bracelets brings back memories of my initial clumsy efforts.

    Proper tools made me more confident. My bracelets became wearable art. The bracelets retained their integrity even after multiple uses. They stayed beautiful and strong for months. 

    Preparing Leather Ends for Secure Clasp Attachment

    The appearance of a bracelet’s clasp cannot compensate for poor quality finishes at the ends. That’s something I learned the hard way. I now exercise greater caution when making leather cuts. I cut the edges precisely to ensure they fit snugly and maintain their position.

    Occasionally I use light sandpaper to improve the grip on the edges. After beginning this process my bracelets remained intact. To achieve secure fitment in jewelry construction you must begin with precise foundational work.

    Every time I work on securing the magnetic clasp to leather I make sure to double-check its fit first. Knowing that my project will stay intact during use gives me great peace of mind. The satisfaction of finishing work with a smooth texture always justifies the effort required.

    How to Attach Magnetic Clasp to Leather Bracelet Properly

    I hurried through the process when I first tried attaching the magnetic clasp to the leather bracelet. It didn’t hold. The clasp moves erratically which causes the leather to detach. I test the fit before gluing to ensure proper attachment. I apply the correct amount of glue, apply strong pressure and wait for it to set.

    That patience really pays off. The clasp remains secure and maintains a strong attachment on my wrist. A smooth clicking sound when it closes brings satisfaction. Each time I complete a bracelet I take pleasure in this particular step. The successful completion of the process ensures a durable bracelet.

    Glue or Crimp Which One Works Best for Longevity

    Both glue and crimps have their own specific applications depending on the situation. Initially I chose glue because of its apparent simplicity. When one of my bracelets broke during an outing it caused me pain.

    The crimps provided stronger holds for thicker bands after I attempted their use. Through experience I discovered that glue provides a tight fit but crimps offer enhanced strength. I now use both when possible.

    The latest magnetic clasp bracelet assembly involved using glue as the primary fastener with a crimp as a backup mechanism. That bracelet is still perfect today. This experience taught me to strengthen security measures and increase carefulness at all times.

    Avoid These Mistakes When Securing Magnetic Closures

    All the mistakes typical for beginners happened to me and I took lessons from each one. I made a mistake once by not allowing the adhesive to cure completely. The leather ended up too short because of my inaccurate cutting.

    My oversight of checking the clasp polarity caused it to push away rather than close properly. Every error took time but provided valuable learning experiences. Now I always test before final fitting. I never rush drying time. I always measure twice before proceeding and make sure to verify the magnet direction.

    Each little step counts toward achieving a bracelet with lasting durability. The key difference between a temporary solution and a durable bracelet comes from proper clasp installation procedures.

    Waterproofing Tips for Leather and Magnetic Clasps

    My bracelets get worn all the time including during outdoor activities. But water was always a problem. The leather became stiff while the clasp strength diminished. I began protecting my leather pieces by applying beeswax or leather protector to them.

    I also switched to rust-resistant clasps. The leather stayed soft while my magnets retained their power after I applied that protective treatment. On one occasion I washed dishes wearing my bracelet without remembering to remove it.

    It survived perfectly. Now Waterproofing stands as an essential step in my crafting routine. Anticipating future issues is a key part of my process when I fit magnetic clasps on bracelets. I aim to create accessories that can withstand actual living conditions.

    Testing the Strength of Your Magnetic Fastener

    After completing a bracelet I would immediately put it on to wear. The bracelet broke during a hug with my friend which was embarrassing. That was embarrassing. I test my magnets for strength before using them.

    I slowly pull on the bracelet ends before twisting it around and moving it as if it’s on a wrist. I make sure to repair any issues before putting on the bracelet. A properly secured bracelet needs to stay attached during all activities.

    Testing my magnetic clasp bracelet after assembling strengthens my confidence to wear it outside. You should discover weaknesses in your product at home before these issues become public. Testing my bracelets gives me peace of mind because it ensures their reliability and safety.

    Repair Tips for Loose or Broken Clasp Attachments

    While walking one of my bracelets unexpectedly fell off. I was heartbroken but also curious. I disassembled the bracelet and discovered that the leather had experienced slight shrinkage. The glue had loosened too. After trimming the leather end I put new adhesive on it before attaching a fresh clasp. It felt good fixing it myself.

    A loose clasp no longer causes me panic. Spare clasps and tools remain close to my workspace all the time. The best practice I have learned is to gently sand down the leather end before applying new glue. It adds grip and strength. Leather magnetic clasps that don’t hold properly can be fixed by following precise repair procedures.

    Styling Ideas with Leather Bands and Magnetic Locks

    My favorite aspect of styling leather bracelets comes from combining different textures and metals together. Magnetic clasps make that so easy. I stack leather bands together with metal cuffs or gemstone beads in my designs.

    Using a combination of thick and thin bracelet styles creates depth on the wrist. Gold and gunmetal clasps pair nicely with neutral leather tones. More people have started layering magnetic bracelets together with smartwatches recently.

    It gives such a balanced, trendy vibe. After I assemble magnetic clasp bracelets I experiment with different outfit combinations. The magnetic finish feels modern and easy. Every look becomes significantly more distinctive because of the small clasp.

    How to Care for Leather Bracelets with Magnetic Clasps

    Caring for leather bracelets serves as a peaceful routine that brings me satisfaction. I gently wipe my bracelets after wearing them to remove sweat. I regularly apply leather conditioner every two or three weeks to maintain their softness. I keep perfume and harsh cleaners away from the clasp area. Magnets maintain their strength if they remain dry and clean.

    I arrange my bracelets flat inside a drawer because it prevents them from developing kinks. I perform monthly inspections to identify any signs of wear and tear. After improving my skills in installing leather bracelet clasps I observed they maintain their durability with minimal maintenance. It’s worth those extra seconds each day. 

    When to Replace a Worn Out Magnetic Jewelry Clasp

    No clasp lasts forever. I’ve learned to spot the signs early. The clasp requires replacement when it feels weak and opens too easily. Occasionally magnets lose strength or metal develops discoloration. That’s okay.

    The bracelet gains renewed vitality when you replace its clasp. The bracelet I love felt completely revitalized after I upgraded it with a stronger magnet. I keep spare clasps from past projects available for when I need them.

    Replacing clasps is a fast solution that extends the life of my beloved designs. When the clasp loses its strength the bracelet still remains wearable. A new magnetic bracelet clasp and some TLC will restore its shine.

    Final Thoughts on Making Leather Bracelets Last Longer

    My initial bracelet-making attempts produced items that failed to endure beyond a month. Now they stay strong for years. The secret wasn’t just better materials. It was learning to respect the process. The details of each cut, clasp placement and glue application play a crucial role.

    I’ve committed errors throughout my experience but gained valuable lessons from each mistake. My advice? Take your time. Test everything. Enjoy the craft. It’s more than jewelry. You create these pieces by hand to wear as a symbol of your dedication and skill.

    Each step from attaching the magnetic clasp to the leather bracelet until the final polish plays a crucial role. The process of creating teaches patience while the finished product delivers enduring happiness.

    Frequently Asked Questions

    How do I prepare the leather before installing a magnetic clasp?

    My first step is to trim the leather ends until they are perfectly clean and even. When edges appear rough I use gentle sanding to improve the grip. It makes the glue hold tighter. Through experience I discovered that speeding through this stage results in clasps that become loose over time. The most reliable foundation for a durable hold requires leather that is free of dirt, moisture, and surface imperfections.

    Can I install a magnetic clasp without using glue?

    The few times I skipped the glue step resulted in mostly poor outcomes. The bracelet separates quickly due to its loose clasp. The glue provides essential additional support to keep your bracelet secure throughout the day. During busy days I ensure durability by always using strong adhesive.

    Can I attach a magnetic clasp to thick leather cords?

    To secure thicker chords you must use a specially designed clasp. A regular-sized clasp I tried proved incapable of fitting properly. A larger and deeper clasp is necessary to securely hold thicker leather. As soon as I found the correct size the bracelet clicked into place and remained secure.

    How to align both parts of a magnetic clasp properly?

    I used to mess this up often. It’s essential to verify magnet orientation before attaching any components with glue. The first step involves pressing both parts together gently to confirm their natural attraction. When everything aligns properly I proceed with the final fitting. Being patient in this step saves you from unnecessary frustration.

    Can I replace a broken magnetic clasp on a leather bracelet myself?

    Absolutely. I’ve done it several times. Initially I removed the old clasp with precision then cleaned the leather ends. After that I refit it using a brand new clasp. I experience pure joy when I restore my favorite bracelet to its former glory. With proper attention and appropriate tools you can complete the job.

  • How to Remove Magnetic Clasp from Leather Bracelet Without Damage?

    How to Remove Magnetic Clasp from Leather Bracelet Without Damage?

    Removing the magnetic clasp from a leather bracelet seems difficult but it is possible to achieve without harming the material. The first occasion I attempted to detach a magnetic clasp from my bracelet remains clear in my memory. The gift leather bracelet worried me because I feared damaging it.

    With time I discovered basic methods to safely and easily remove the magnetic clasp. Keep calm if you share the same apprehension about this task. This post shows you the procedure to detach the magnetic clasp from your leather bracelet while preserving its pristine condition.

    Why You Need to Remove Magnetic Clasp Safely

    The first time I had to take off the magnetic clasp from my leather bracelet made me feel nervous. You must handle the magnetic clasp removal process with care to avoid damaging the bracelet. I understood that following correct procedures would prevent many problems. I understood fast that following proper procedures would prevent significant difficulties.

    With experience I discovered that gradually detaching the clasp from leather prevents stretching and tearing. Implementing the correct method gave me assurance that I could avoid needing to replace the leather bracelet clasp. Your bracelet needs protection to maintain its beautiful appearance.

    Understanding Magnetic Clasps and Leather Bracelets

    Magnetic clasps provide both convenience and security which makes them useful but they need careful handling. The design of leather bracelets typically includes these clasps because they provide simple wearability. While the clasp’s magnetic force provides secure attachment, improper handling may result in complications.

    The first time I replaced a leather bracelet clasp taught me about the necessity of knowing the attachment method. The magnet’s power plays a role in this system. Understanding the attachment mechanism of the clasp helps prevent excessive stress when detaching magnetic clasps.

    The Risks of Removing Magnetic Clasps Incorrectly

    If you remove a magnetic clasp improperly you might encounter a disastrous experience. I acquired this knowledge through a difficult experience when I tried repairing a leather bracelet magnetic clasp without using the correct safety measures. Forcing the process or working too quickly will stretch the leather and cause tears or deformations.

    When I tried to separate the clasp quickly my bracelet ended up damaged. The metal may bend or break when excessive pressure is applied during the process. My experience proved to me that proper procedures are essential for safely removing clasps without damage.

    Tools You’ll Need to Remove Magnetic Clasp

    Correct tools for magnetic clasp removal are essential for success. I found that using a pair of soft pliers was the best way to carefully open the clasp. The small flat-head screwdriver proved useful for detaching the clasp from the leather surface.

    Avoid using harsh tools because they could scratch the metal and harm the leather. Using a soft cloth prevents your bracelet from getting marked. Through repeated trials I determined that these tools were sufficient to safely detach the magnetic clasp without damaging anything.

    Step by Step Guide to Detach Magnetic Clasp Without Damage

    Following a magnetic clasp detaching guide requires careful patience to avoid damaging materials. I start by carefully loosening the clasp with a soft tool while taking care not to apply too much force. I carefully navigate my way around the clasp until it releases itself from the leather.

    I avoid sudden movements because they have the potential to stretch or tear the material. When you feel uncertain you should move at a slow pace to prevent making errors. Once the clasp detaches properly I examine the leather looking for any evidence of stress. This method is my standard procedure to ensure my bracelet remains undamaged.

    Magnetic Clasp Removal: Avoid These Mistakes

    Understanding what actions to avoid is equally beneficial as understanding which actions to follow. Here are a few common missteps:

    • Pliers tend to squeeze or damage clasps when they are used to handle them.
    • Omitting the inspection step requires a unique approach for different clasp types.
    • Taking force to remove the clasp can harm the leather or cause it to tear.
    • If you fail to support the leather during manipulation it becomes warped or permanently bent.
    • Directly applying glue without cleaning will shorten the lifespan and strength of the hold.

    Following these guidelines maintains both the integrity and appearance of your bracelet.

    Repairing Leather Bracelets After Clasp Removal

    Don’t worry if the leather becomes damaged while removing a magnetic clasp. In my experience fixing leather bracelet magnetic clasp problems many repairs prove to be straightforward. When small tears or scratches appear on leather I treat them by applying leather conditioner which facilitates healing.

    When I encounter major problems with my bracelet, I consult a professional who can mend the leather. The complete restoration of a leather bracelet can be achieved through small repair techniques such as re-stitching. The solution lies in preservation because proper care can restore its vitality.

    Leather Bracelet Repair Tips for Long-Term Care

    With your clasp repaired or replaced we want to maintain its condition. These tips help extend the bracelet’s lifespan: 

    • Place the bracelet flat during storage to avoid bending and leather creasing.
    • Protect the bracelet from moisture since it breaks down adhesive strength and stretches leather material.
    • Use a gentle cloth to clean dirt and sweat off your bracelet.
    • Applying leather conditioner constantly stops cracks from forming and preserves the bracelet’s flexibility.
    • Perform routine inspections of the clasp to detect weak magnets and adhesive problems before they become larger issues.

    Proper bracelet maintenance ensures optimal functionality and helps avoid expensive future repairs.

    How to Reattach a Magnetic Clasp to Leather Bracelet?

    Once you understand the process of reattaching a magnetic clasp after removal becomes very simple. I position the clasp carefully to make sure it attaches securely. I press the clasp into its place using small pliers and make sure not to tighten it too much. Before putting it back on my wrist I make sure the magnet stays securely attached.

    There have been moments when I needed to tweak the clasp to secure it properly while avoiding leather damage. Fixing a clasp back in place can be challenging but requires patience and proper tools to accomplish. I have successfully repaired my bracelet repeatedly by following this technique.

    When to Seek Professional Help for Magnetic Clasp Removal?

    The best course of action can be to depend on professionals for complex tasks. When I attempted to take off a magnetic clasp the situation got worse than I had anticipated. From those experiences I learned that consulting an expert is the wiser choice.

    Jewelers and leather specialists possess both expertise and specialized tools that enable them to perform delicate tasks such as clasp removal without causing any damage. Seek professional support if your skills are inadequate or you prefer to avoid risk-taking. The incident taught me that seeking assistance brings valuable mental relief.

    Final Thoughts

    Expert skills are not required for successful magnetic clasp removal from a leather bracelet. To remove a magnetic clasp from a leather bracelet successfully you need to understand the clasp mechanism and support the leather while treating the bracelet carefully.

    This magnetic clasp removal guide allows you to perform repairs on your bracelet confidently without worrying about causing damage. You can restore your bracelet to a brand-new appearance by following certain steps while you replace the clasp or fix a loose one and even if you want to give it a minimalist makeover.

    Frequently Asked Questions

    Is it safe to remove a magnetic clasp from a leather bracelet at home?

    You can safely remove a magnetic clasp at home by following appropriate safety measures. I’ve successfully performed this task numerous times because using the right tools and following a methodical approach will lead to success. Take your time during the leather handling stage and execute each step with care. Success depends on taking things slowly and practicing patience throughout the process.

    Can I reuse the magnetic clasp after removal?

    Absolutely! I’ve reused magnetic clasps multiple times. You can reattach the clasp to your bracelet or a different one if it remains undamaged through the removal process. Check that the magnet maintains its strength and the metal structure remains undamaged. By reusing the clasp I was able to save money and keep my bracelets in excellent condition without needing to purchase a new clasp.

    Will removing the clasp weaken the leather bracelet?

    A properly executed clasp removal process will not damage your leather bracelet. Based on my experience proper clasp removal requires patience to avoid any damage. The bracelet will maintain its strength provided the leather stays intact and free from damage during the procedure. After I finish I make sure to inspect my bracelet for any damages.

    How long does it take to remove a magnetic clasp safely?

    It really doesn’t take too long. From my experience the careful removal of the clasp takes between 10 to 15 minutes. Your ability to avoid mistakes when removing the bracelet clasp depends on following proper procedures without rushing which varies according to the bracelet’s delicacy. A smooth and easy process requires both patience and proper tools.

  • How to Open Magnetic Bracelet Clasp? (No Tools Needed)

    How to Open Magnetic Bracelet Clasp? (No Tools Needed)

    The initial challenge I faced was opening a magnetic bracelet clasp. It felt impossible. I pulled and turned the clasp while feeling a slight panic that I could damage it. But I figured it out. The difficulty of opening magnetic bracelet clasps without tools leads to understandable frustration.

    Opening this small sleek device becomes frustrating when you’re hurried or alone. There is an easy method to open the magnetic bracelet clasp without needing pliers or experiencing hand pain. Here I will demonstrate the precise method I discovered to open this mechanism safely while saving time and avoiding pain. Let’s make it easy, together.

    Why Magnetic Clasp Bracelets Can Be Tricky

    Initially I believed magnetic clasp bracelets would be simple to put on and take off. But then I struggled. I found myself frustrated because the clasp would not open without difficulty. I struggled to open the bracelet magnet closure without causing harm to the bracelet or scratching my nails.

    Without tools available I needed to solve the problem on my own. The real challenge lay in utilizing the magnetic force rather than the clasp mechanism itself. After several attempts I learned an effective method to open magnetic clasps which consistently works.

    Common Types of Magnetic Jewelry Closures

    Multiple magnetic jewelry closure styles exist and each one operates differently. Certain closures operate with sliding mechanisms and other closures utilize push-and-release designs. When I first came across a sliding magnetic clasp I didn’t understand how it worked. I thought I was missing something.

    Learning their operation revealed that a gentle touch at the precise location is the key to success. My current clasp opening techniques change based on the clasp style. Success rates improve significantly when users understand the particular mechanism behind both simple bar clasps and complex designs.

    Best Way to Open Magnetic Bracelet Clasp Easily

    Opening a magnetic clasp effectively requires applying the appropriate motion. I kept pulling on it until the realization hit me that brute force had nothing to do with it. The secret? Start by pressing the clasp lightly before you slowly separate the pieces. A basic movement will unlock the magnetic hold.

    During another moment of frustration I experienced the solution. My pull was too strong and rapid. Opening the magnetic clasp with this simple technique brought me great relief. The proper touch is essential and reliable for every instance.

    Understanding the Magnetic Clasp Mechanism

    Understanding the mechanism of a magnetic bracelet clasp is essential before you learn how to open it. Metallic ends of these clasps contain small hidden magnets. The clasps snap together when they touch and maintain their closure through magnetic attraction.

    Magnetic clasps fall into three fundamental categories.

    1. Direct Pull-Apart Clasp

    This type relies on magnetism only. You pull both sides gently apart.

    2. Slide Lock Magnetic Clasp

    It combines sliding and magnets. It requires a sideward motion to release.

    3. Fold-Over Magnetic Clasp

    The magnetic clasp features a compact latch which folds into position and secures itself with an underlying magnet.

    Recognizing the type of clasp you have solves half the problem since different clasps require different opening techniques. Examine how your bracelet fastens by examining it closely. It will guide your hand movement.

    How to Remove Magnetic Bracelet Without Tools

    The idea of reaching for tools to remove my bracelet was something I always disliked. It became clear to me that magnetic bracelets can be opened without needing any tools. You can open the bracelet by gently moving your fingers in a steady motion without any tools. My skills have developed so much that I manage to open my bracelet really fast.

    Success comes when you locate the proper angle while maintaining a firm yet gentle grasp on the clasp as you pull. No more struggling or rushing for pliers. After regular practice you will unlock the bracelet magnet closure with ease exactly as I learned to do.

    Simple Finger Techniques for Quick Release

    The finger technique seemed magical after I grasped its principles. The key to the technique involves gripping the clasp using your finger pads. I believed pressing hard would be beneficial so I applied excessive force. I’ve discovered that a gentle touch effectively completes the task.

    My thumb holds the clasp steady while my index finger opens it with a smooth motion. It was a game-changer for me. This straightforward finger technique enables quick magnetic clasp opening while maintaining efficiency through a seamless and effortless process.

    Tips for Weak or Slippery Magnetic Locks

    Magnetic locks may feel weak or slippery which makes it difficult to maintain a solid grip. My favorite bracelet experienced the same issue because the clasp wouldn’t remain securely shut. To maximize the magnet power I recommend cleaning the surrounding area.

    The magnetic strength diminishes due to dust and skin oils. After cleaning the lock surface the clasp opened smoothly without any problems. You can unlock the bracelet magnet closure quickly by applying firm pressure to both ends simultaneously when extra force is needed.

    Avoid These Mistakes When Opening a Bracelet

    During my initial experience with magnetic clasps, I committed numerous errors. The most significant mistake I made involved excessive force on the clasp which resulted in frustration or potential damage.

    I discovered through experience that quickly pulling the bracelet apart would not work. To detach the clasp without damage or frustration gently pull each end in opposite directions using minimal pressure.

    I experienced a complete transformation after mastering the proper technique. So, avoid using excessive force. When you proceed slowly with creating the bracelet it extends its durability and guarantees flawless operation.

    What to Do If the Clasp Gets Stuck

    It’s happened to all of us: When the clasp locks up you experience a sense of powerlessness. Despite my best efforts I couldn’t get my bracelet to open because the clasp remained stuck. Once my panic subsided I recalled the delicate nature of magnetic clasps. Now when I face a stuck clasp I gently move it back and forth to loosen it.

    I exert minimal pressure to detect when the magnet begins to open. Don’t force it open. When the clasp refuses to move, breathe deeply to stay collected and give it another attempt. It’s important to remain patient when you encounter difficulty opening the clasp.

    How Magnetic Clasps Work Behind the Scenes

    The science behind magnetic clasps is fascinating! A magnetic field operates to maintain the bracelet’s position in a secure manner. The interaction of the magnets within my magnetic bracelet was not something I understood when I first received it. A magnetic lock binds the two ends of the bracelet together through its clasp. 

    I discovered that magnetic lock strength relies on the magnets being properly aligned. After understanding how the magnets worked I knew how to manage my bracelet better. Magnetic bracelets with stronger magnets become harder to open yet provide better safety.

    Care Tips for Long Lasting Magnetic Fasteners

    My magnetic bracelet required better maintenance after I had worn it for several months. Magnetic clasps require careful treatment to avoid damage. To maintain your clasp free of dirt and oils it is important to wipe it regularly with a soft cloth. The magnets remain strong because they stay in excellent condition through regular maintenance.

    I avoid exposing the bracelet to both water and extreme heat because these conditions can gradually weaken magnetic strength. These simple precautions will improve your bracelet’s longevity while maintaining smooth clasp operation.

    Pros and Cons of Magnetic Clasps

    Knowing what magnetic clasps can and cannot do allows you to expect realistic performance.

    Pros:

    • Secure – They stay closed throughout daily wear.
    • Elegant – Clean, seamless design suits all styles.
    • They can be worn or taken off without any additional tools.
    • The magnetic clasp system operates quickly since you can open it within seconds after mastering the proper technique.

    Cons:

    • Beginners will find magnetic clasps require practice to operate smoothly.
    • Magnets become weaker when they are exposed to water over time.
    • These clasps can adhere to metallic surfaces which include items such as zippers and phones.
    • Magnetic strength reduces slightly after repeated use over time.

    Magnetic clasps maintain their status as highly user-friendly bracelet closures despite some minor challenges.

    When to Replace a Magnetic Bracelet Lock

    Eventually I noticed that my magnetic bracelet was not closing securely like it used to. My frustration grew but I recognized the need to look into getting a new clasp. This procedure is straightforward and does not require professional jeweler assistance.

    When the magnet’s strength diminishes it becomes necessary to get a new one. Perform consistent inspections of the clasp to identify signs of wear and tear. When magnets stop working properly users should unlock their bracelet magnet closure to replace the old clasp with a new one.

    Final Thoughts on Opening Magnetic Jewelry Safely

    My many trials and errors proved that opening magnetic jewelry can be simple when you know the correct method. You need to master the correct method and apply soft pressure to succeed. Over years of wearing magnetic bracelets I now open them effortlessly.

    By implementing today’s tips you’ll discover that opening bracelet magnet closures becomes simpler as time passes. Your confidence in wearing your magnetic bracelet will increase as you continue to practice opening it. Enjoy the ease of magnetic clasps by staying calm and handling them gently.

    Frequently Asked Questions 

    Are magnetic clasps suitable for people with limited hand mobility?

    Magnetic clasps are an excellent choice for users who experience difficulty with hand movement. Traditional clasps are more difficult to open compared to magnetic clasps. After using the magnetic closure for a while it becomes simple to operate. You don’t need much strength or dexterity to open them so they are a functional selection. People who experience hand mobility limitations manage to operate magnetic clasps easily and without any difficulty. It’s truly a game-changer for accessibility. 

    Do magnetic clasps wear out or get weaker over time?

    Magnetic clasps tend to weaken after continuous use as they age. My personal experience confirms this issue and it leads to frustration. Constant opening and closing combined with extreme conditions will reduce the magnets’ effectiveness. The clasp should be replaced if you detect that it has lost some of its holding power. Regular maintenance including cleaning serves to both prolong its lifespan and ensure proper operation.

    How do I prevent damaging my bracelet while opening the clasp?

    To avoid damage you must always handle the clasp with care. During my initial experiences with magnetic clasps I made the error of pulling them too forcefully. My experience improved dramatically after discovering how to handle the clasp correctly. Ensure that the clasp remains steady and use smooth controlled pressure to open it. If the clasp is hard to open try gently moving it back and forth. Protect your bracelet from accidental damage through a patient and calm method.

    Are magnetic clasps safe to use on expensive bracelets?

    Expensive bracelets remain unharmed by magnetic clasps when you select them carefully. I have used magnetic clasps on my finer jewelry without experiencing any problems. Only use a high-end clasp and make sure it’s fastened securely before wearing your jewelry. The clasp remains in excellent condition when cared for properly. Magnetic clasps should not be used on delicate or heirloom jewelry pieces unless they have been specifically created for such items.