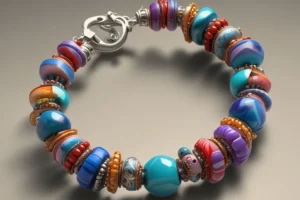
The day I attempted to reduce the length of my shorten leather bracelet with magnetic clasp stands out in my memory. The bracelet slipped from my wrist repeatedly which filled me with fear of permanently losing it. The bracelet had significant meaning because it was a precious gift which held memories I wanted to preserve.
My attempts to find assistance online met with confusing information and tools beyond my capabilities. Through shaky hands and hopeful determination I solved the problem by working through each step myself. I’ve got the perfect guide to help you shorten your leather bracelet with a magnetic clasp. I’ll guide you through the process carefully as though I’ve been through it myself.
Why Resize a Loose Leather Bracelet
The repeated slipping of my bracelet indicated that I needed to take action. It wasn’t just an accessory. It held memories and meaning. Once your leather bracelet extends beyond your wrist size it loses its sense of belonging to you. Each slip over my hand brought frustration as the bracelet didn’t fit properly.
I didn’t want to stop wearing it. I just wanted it to fit right. I began researching personal methods to resize my bracelet at that time. A simple fix brings surprisingly great comfort. When you resize it to fit you perfectly you will find happiness again. And it’s easier than it seems.
Understanding Magnetic Lock Mechanisms
I had always believed magnetic locks posed too many challenges to modify. With sufficient patience you will find that changing magnetic clasp bracelets isn’t difficult. Tiny magnets enable these clasps to snap their ends together securely.
Separating them requires nothing more than a smooth pull without any need for twisting or clicking. After learning how the clasp functioned I found all subsequent tasks simpler. Understanding the internal structure gave me the confidence to open the magnetic lock.
It’s okay to feel nervous if you’ve never encountered this type of clasp before. The bracelet stays intact when you separate the clasp slowly and remain composed. I now understand the clever design of magnetic clasps and find them truly innovative.
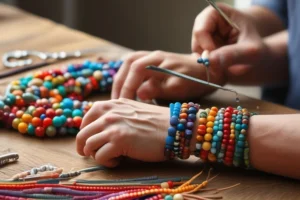
Tools You’ll Need to Shorten a Leather Bracelet
Assemble these tools before you begin working on the magnetic clasp bracelet modification.
- A sharp pair of scissors or a precision knife is crucial to achieve clean cutting results.
- Strong leather adhesive: The strong leather adhesive is necessary to attach the new leather end securely inside the clasp.
- Ruler or measuring tape: For accurate measurement.
- Pencil or fine marker: To make faint cutting guides.
- Flat-head screwdriver: The small screws from specific magnetic clasps require a flat-head screwdriver to be removed.
Preparing necessary materials beforehand enables efficient operation which also reduces stress levels.
Measuring Your Wrist for the Perfect Fit
I used a flexible measuring tape to wrap around my wrist and determine the appropriate length.
Finally, I extended the length slightly for better comfort. A bracelet that feels too tight feels incorrect while one that is too loose becomes unusable. Since you only have one opportunity to make the cut properly you should proceed with careful attention.
Always measure twice before you shorten leather wristband material. Before cutting the material I marked it with a pencil. Your bracelet should rest comfortably without moving out of place. Accurate measuring prevented me from cutting the wristband too short. Taking this action provided me with both control over the process and peace of mind. It’s all about getting it just right.
Step-by-Step Guide to Shorten Leather Wristband
To reduce the length of your leather wristband adhere to these instructions carefully.
Step 1: Examine the Clasp
Look closely at the magnetic clasp.
Some open easily; others need unscrewing.
Determine whether your bracelet has adhesive securing it inside or screws holding it in place.
Step 2: Measure Your Wrist
Place soft tape around your wrist and wrap it until it fits tightly.
Include a bit of extra space in your measurement to create a looser fit.
Note down the final measurement.
Step 3: Mark the Leather
Lay the bracelet flat.
Determine the amount of leather that exceeds your wrist measurement.
Use a pencil to indicate the spot where you should make your cut.
Step 4: Cut the Bracelet
The excess leather should be cut using either sharp scissors or a craft knife.
Make the initial cut shorter than you think as you can always make further trims later.
Step 5: Prepare the Ends
Gently sand down any rough areas on the cut edge.
The light sanding of the cut edge makes the bracelet slide into the clasp with ease.
Step 6: Attach the Leather Back to the Clasp
When using glue for your clasp apply a thin layer inside the magnetic opening.
Press the inside of the leather and maintain pressure for several minutes.
When using screws with your clasp make sure to position the leather back properly before tightening it securely.
Step 7: Let It Set
Before wearing make sure that glued leather has dried for several hours.
Check for strength before using it again.
Your bracelet has been restored to its snug and stylish condition.
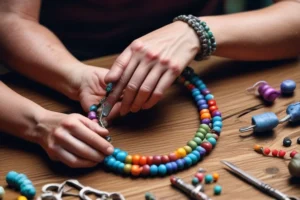
Reattaching and Securing the Magnetic End
Attaching the leather to the clasp in this step needed both steady hands and strong adhesive. With careful motion I moved the leather piece back into the clasp. The leather had to rest deeply enough for a secure fit. I only applied one small drop of glue to complete the task.
The leather clasp required firm pressure before I allowed it to dry throughout the night. Skipping or rushing the drying period will affect the end result so make sure to wait until it fully dries. You want the connection to last.
The dried glue produced a strong bond that restored both solidity and newness to the surface. The magnetic clasp bracelet modification finished with this simple step. I felt a sense of satisfaction when I observed everything fit together flawlessly.
Tips to Avoid Common Bracelet Shortening Mistakes
I have many things I wish I had known before now. Measure twice before you cut anything. Avoid using too much force when opening the clasp. And never rush through the gluing process.
Most errors happen when steps are missed or actions are completed too quickly. I learned that patience really pays off. When your leather bracelet ends up being too long you should stay calm and take a breath. Careful practice will enable you to repair it successfully.
The procedure requires more mindfulness than physical tools. Most issues disappear when you move at a slower pace and believe in your abilities.
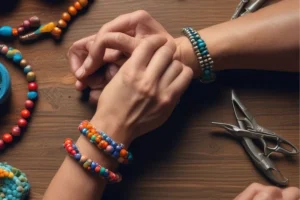
Testing the Fit After Resizing the Band
After the glue had dried fully I placed it on my wrist. It felt like a perfect fit, finally. I moved my hand in different directions but it remained fixed in its position. The device remained secure on my wrist without any slippage and I didn’t need to worry about losing it. My heart lightened as I experienced a brief surge of happiness.
Solving the problem myself created a unique sense of achievement. It wasn’t just about looks anymore. I spent the time necessary to reclaim ownership of it. That final fit test confirmed everything worked. The perfect fit increased my desire to wear it all the time.
When to Seek Professional Jewelry Repair Help
Extra features on bracelets such as charms or screws require professional assistance. Some designs are trickier than others. The braided bracelet I saw on my friend clearly required professional attention. Leather can vary in thickness and structure. Protect your gifts or expensive items from damage by taking proper care when handling them.
If in doubt, ask a jeweler. Their expertise allows them to adjust leather bracelets more effectively. It’s always okay to ask for support. Wanting professional quality work is completely acceptable. Your memories deserve that respect too.
Caring for Your Leather Bracelet After Resizing
After it fit properly I made sure to maintain it in excellent condition. I discovered that proper storage involves keeping it flat and away from moisture. The condition of leather relies on proper care because it naturally alters through weather exposure and aging. I gave the leather conditioner occasional treatments.
Do not wear the item when swimming or when you sweat abundantly. These small habits help preserve the quality. The bracelet takes on an added special touch following its resizing. Make sure to give it that special little extra attention. It’s not just a band, it holding moments. Taking care of it means safeguarding the memories it holds.
DIY vs Professional Bracelet Resizing Services
I gained confidence because completing the task myself felt rewarding. I recognize that there are valid reasons why others choose professional services. Jewelry stores have access to specialized tools which allow them to perform adjustments with additional precision and care.
If you’re nervous, that’s totally valid. The personal attempt creates a stronger bond with the task. Your bracelet reveals new insights when you explore it yourself. Projects involving leather wristband shortening offer enjoyment while providing therapeutic benefits.
It’s not just about fixing something. It’s about finding comfort in creation. You have two acceptable paths forward and your choice should reflect your personal comfort level.
Final Thoughts on Customizing Leather Wristbands
Every bracelet tells a story and it should fit your wrist perfectly. I gained more than just a solution when I learned to modify mine. It gave me pride, peace, and confidence. The significance of the tiny object exceeded my expectations. I enjoy wearing my bracelet again because I no longer worry about it falling off.
You can achieve this result by adding a simple magnetic clasp to your bracelet. This process creates a deeper connection to something that you hold dear. And it’s completely worth the effort. Take your time while working and breathe steadily as you rely on your hands. The results of your creation will astonish you.
Frequently Asked Questions
Do I need special tools to shorten a leather bracelet?
I initially believed that fancy tools were necessary but ended up needing them not at all. All I needed was a sharp pair of scissors along with a ruler and strong glue plus a small tool such as tweezers. All my tools came from the drawer I already had. It felt great not needing anything complicated. Take your time to organize everything before you start working with precision. Your preparedness and calm state will reveal the task’s surprising simplicity.
Will shortening a leather bracelet damage the magnetic clasp?
My biggest fear came to nothing as the clasp remained completely intact. I opened it slowly with care to avoid rushing. The clasp remains intact when you avoid twisting or forcing it. I carefully used tweezers to wiggle it until it came loose. It held strong even after reattaching. With careful patience you can ensure it remains strong.
Should I go to a jeweler to resize a magnetic leather bracelet?
A jeweler would be a sensible option for bracelets that feature intricate designs or hold sentimental value. I wanted to experience the satisfaction of completing the task on my own. I began slowly and methodically followed each step which allowed me to develop a deep appreciation for the entire process. When in doubt, never hesitate to request assistance. The main priority is to create a bracelet that feels comfortable and remains durable.
How to reattach the clasp after cutting the leather strap?
Once I finished cutting I attached a tiny drop of strong glue to the leather tip. With care I positioned the piece back into the clasp. I placed it down to remain still until it dried while I slept. It felt steady the next morning. That moment had a magical feeling because the bracelet looked exactly like before yet it now fit me perfectly. This minor adjustment generates tremendous happiness.