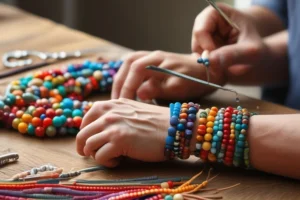
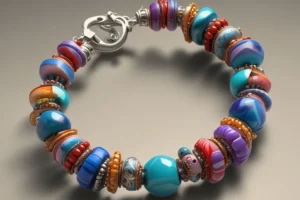
Crafting a seed bead bracelet with clasp attachments stands as one of the most fulfilling do-it-yourself projects. My initial seed bead bracelet creation became magical as I observed how small beads transformed into a stunning piece.
The best part? You transform your designs into unique personal masterpieces through customization. Creating a seed bead bracelet with a clasp develops your artistic talents and brings personal satisfaction since you love to enhance your accessories with special features.
You can design your own bracelet through this simple process which employs these easy-to-use yet striking details.
Gather Your Materials and Tools
Prepare all your materials before beginning to make a bracelet with seed beads. A clutter-free workspace is key.
- Seed Beads – Choose size 11/0 for beginners. The beads are simple to work with while producing stunning patterns.
- Nymo thread along with FireLine and WildFire make excellent thread choices. Strong and flexible.
- Beading Needle – Thin needles are a must. Seed beads fit best with needles that are size 10 or size 12.
- Select lobster claw clasps, toggle clasps, or magnetic clasps because they offer easy usage.
- Your bracelet looks more professional when you use scissors or thread snips for clean cuts.
- A Bead Mat or Tray keeps your beads in place and maintains organization during your work.
Beading beginners will find the process becomes much easier with these tools.
Choosing the Right Seed Beads for Your Design
The choice of beads you pick determines whether your design succeeds or fails. It became clear to me early on that seed beads vary in quality and type. The appearance of your bracelet will change according to the bead size and color selection.
Use various colors to enhance your design but select beads of the same size to simplify the weaving process. Beginners who explore various beading techniques should try out multiple beads shapes and finishes.
I prefer using matte or frosted beads because they provide a subtle yet sophisticated appearance. The initial phase of developing a unique piece begins with selecting beads that reflect your personal style.
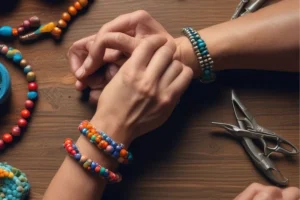
Picking the Perfect Clasp for Your Bracelet
The clasp seems unimportant but actually determines the bracelet’s full look. The search for the right clasp hindered my progress during my initial seed bead project which led to frustration. A reliable clasp ensures your seed bead bracelet stays secure while adding an elegant touch to its design.
You can choose between lobster clasps, toggle clasps and magnetic closures to match your particular design preferences. Magnetic clasps work better for beginners because they are simpler to handle. Choose a clasp that matches your bracelet style and take time to find the perfect one.
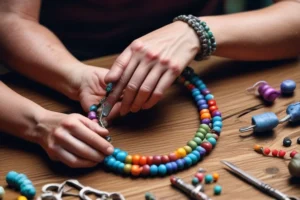
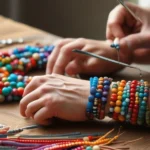
How to Thread Seed Beads onto String or Wire
The process of threading seed beads onto wire or string stands out as one of the most enjoyable tasks when creating bracelets. The process initially challenged me but after discovering my rhythm I found it became natural. You should use a beading needle to thread seed beads when constructing a bracelet with thread.
The process becomes straightforward and seamless through this method. I like using nylon thread because it combines strength with flexibility but wire serves as a better option for additional sturdiness. Thread the beads at your own pace and avoid hurrying through the process. Greater patience results in a more exquisite finished bracelet.
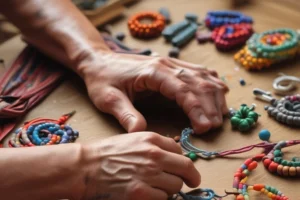
Creating the Pattern for Your Seed Bead Bracelet
The process of designing a bracelet pattern represents the moment your creative skills shine through. Both following established techniques and developing unique methods require a process of trial and error. I begin by drawing my ideas to understand how the beads will connect in sequence.
Beginners should start learning beading techniques with basic patterns. You can explore different patterns using straight rows and curves while adding small accent beads to enhance the design. Your personal style will shine through the beautiful jewelry piece you create by using your creativity and patience.
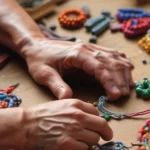
Attaching the Clasp with Secure Knotting Techniques
Attaching the clasp stands as one of the most essential steps in the creation of seed bead bracelets. The use of strong knotting methods is essential to maintain the structural integrity of the bracelet. Making knots stronger requires doubling the thread used during the tying process.
Seed bead bracelets both function effectively and appear stylish when they have a dependable clasp. Select between a basic knot or an advanced technique based on your knot-tying expertise.
After securing the knot you need to trim the remaining thread carefully to prevent fraying. The process involves some difficulty but becomes straightforward as you practice.
Final Touches to Complete Your Seed Bead Bracelet
After stringing your beads and securing the clasp you should proceed to the finishing steps. The moment when the bracelet begins to feel like a complete item represents my favorite part of the process. The bracelet receives my inspection to confirm its correct fit and secure clasp.
To achieve the desired bracelet length simply add more beads or take some away. To make the bracelet uniquely mine I add a small charm or bead at its end. A few simple adjustments will prepare your bracelet to become a beautiful accessory for yourself or a thoughtful gift.
Tips for Customizing Your Seed Bead Bracelet Design
When you personalize your design you get to add your own unique touch which is the most enjoyable aspect. By designing patterns and mixing bead sizes or by adding charms you can personalize your creation.
My bracelet designs featured specific colors that matched certain outfits and events which turned each piece into something unique. The design becomes more sophisticated when you incorporate small decorative pieces such as crystals or gold beads.
Using various bead finishes will help you achieve textured designs with added depth. The seed bead bracelet guide should push you to go beyond traditional designs and discover various creative options. This craft stands out because of the extensive personalization opportunities it offers.
Troubleshooting Common Bead Weaving Challenges
Weaving can be frustrating at times yet it serves as an important element of the learning journey. I often encountered uneven tension as a recurring difficulty during the seed bead bracelet making process with clasps.
Tight thread causes beads to move in an uneven manner. A bracelet becomes delicate when the thread tension is insufficient. I prevent uneven tension by periodically examining my progress and making necessary changes.
The task of keeping beads free from tangles and blockages presents yet another challenge during the bracelet-making process. You should use a beading mat to ensure all beads stay where they should. These small hurdles turn much easier to manage as you demonstrate patience over time.
Caring for Your Seed Bead Bracelet to Keep It Lasting
Maintaining your seed bead bracelet holds equal importance to the process of creating it. My first bracelet creation became tangled and lost its luster which taught me an important lesson. I make sure to clean my bracelet using a soft cloth after every use.
To protect your jewelry from damage keep it dry and store it in a box or pouch. I prevent wearing my bracelet in situations where it might become snagged or scratched. If you maintain your bracelet properly it will endure through many years and serve as a memory of your original craftsmanship.
Explore Unique Clasp Variations for Seed Bead Bracelets
The process of making a seed bead bracelet becomes enjoyable through the exploration of diverse clasp options. The number of choices available left me in awe. All clasp types present distinct aesthetics and functionalities.
To achieve a sophisticated and detailed look, consider using either a box clasp or a clasp embellished with decorative elements. Magnetic clasps provide effortless convenience for users who seek simplicity in their closure choice.
Choose whichever clasp seems right to you but ensure it matches your design concept. Trying out different types of clasps brings added creative possibilities to your bracelet-making experience.
Why Seed Bead Bracelets Make Great Personalized Gifts
Seed bead bracelets create wonderful presents because they provide a personal connection which mass-produced jewelry lacks. I find joy in giving these handmade bracelets to my friends and family because I know they will cherish jewelry made uniquely for them.
The best part? Each bracelet design can be adjusted to reflect the recipient’s personal style and personality. When bracelets display their favorite color or stand-alone patterns they transform into one-of-a-kind presents.
The time and effort needed to craft a seed bead bracelet with clasp earns people’s gratitude. This gift reveals your caring nature by showcasing thoughtful planning.
Common Mistakes Beginners Make
Avoid these pitfalls as you practice.
- Excessive tension during threading creates stiffness and warping in the bracelet.
- If you estimate length without measuring you will end up with an ill-fitting bracelet.
- If you use incorrect thread it will easily fray or snap.
- A single pass won’t reinforce the clasp effectively; instead, perform two to three passes.
- Unbalanced color schemes lead to poor aesthetics that can ruin an otherwise well-made bracelet.
Mistakes are normal. The key step is to use mistakes to advance your crafting skills.
Final Thoughts: Enjoy the Creative Process
Mastering the craft of creating seed bead bracelets that feature clasps allows you to develop both fulfillment and creativity through this skill. Creating handmade items provides satisfaction regardless of whether you wear them or give them as gifts.
This seed bead bracelet guide provides every beginner-friendly step required for you to succeed. Begin with basic designs and maintain your patience while allowing your imagination to guide your progress.
Frequently Asked Question
Which thread is best for seed bead bracelets?
After beginning my seed bead bracelet-making journey I discovered that nylon or polyester thread produces superior results. The material demonstrates both strength and flexibility which results in smooth threading processes and robust designs. Nylon thread remains my preferred choice because it maintains its structure without fraying and shows good longevity. Choose a thread size that corresponds with your beads to prevent uneven spaces and tension problems.
How long should a seed bead bracelet be for a comfortable fit?
I create seed bead bracelets that measure between 7 and 8 inches in length to ensure they fit comfortably. That’s an average size for most wrists. Always measure your wrist first to guarantee a perfect fit when crafting. Measuring your wrist before starting helps you save time and prevent mistakes because you can adjust the length by adding or removing beads.
Which clasps are most durable for seed bead jewelry?
After experimenting with different types of clasps I discovered that toggle and lobster clasps stand out as the most reliable options for seed bead bracelets. These clasps offer reliable strength while remaining simple to handle in jewelry making. I choose metal-based clasps because they tend to outlast their plastic counterparts. The strength of a clasp determines how securely your bracelet will remain attached over time.
What are common mistakes to avoid when attaching clasps to seed bead bracelets?
During the initial stages of attaching clasps to my bracelets I frequently failed to secure the knots sufficiently. The clasp will eventually become loose if the knots are not properly secured. Trimming excess thread too close to the knot can cause it to unravel. To secure your clasp properly, tie multiple knots and leave a small length of thread before cutting away the excess.