The first time I attempted to tie a bead bracelet without a clasp remains vivid in my memory. My hands shook with excitement. I couldn’t understand why this basic task generated such deep significance.
I aimed to create a unique item that was solely intended for my personal enjoyment. I wanted to avoid making errors but at the same time I wanted to prevent it from appearing overly refined. Just raw, handmade beauty.
This learning experience transformed my perspective on jewelry. It’s not just craft, it’s connection. I understand the struggle to finish a bracelet with a neat appearance because I’ve experienced it myself. I want to demonstrate the straightforward approach which I discovered.
Why Go Clasp-Free for Your Beaded Bracelets
I experienced repeated problems with clasps that refused to fit together correctly. They’d twist or break, ruining my vibe. I found joy in creating bead bracelets that don’t need a closure.
It felt so free, so personal. No metal, just thread and intention. It’s not just about skipping hardware. The bracelet attaches to your skin and moves with every action you make. I’ve found this style trending more lately.
It’s minimal yet meaningful. For a sleek natural appearance this method delivers. Trust me, it’s not harder, just more thoughtful. And the feeling of creating it yourself? Absolutely worth every knot.
Choosing the Right String for Beadwork Projects
I selected a string because of its beauty which later turned out to be a mistake. Big mistake. It snapped before the day ended. Time taught me that the type of thread we use is more important than most people consider.
When crafting bead bracelets without metal findings my choice always falls on durable and flexible cord materials. Stretch cords perform extremely well yet waxed threads provide adequate performance as well. They hold knots well and feel smooth. Don’t go for looks only to test your strength too.
Your ideal accessory combines both comfort and style. Since I started using higher quality threads my bracelets have become more durable. They also feel more authentic. The material you select as your foundation establishes the standard for all subsequent knots.
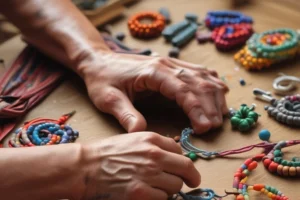
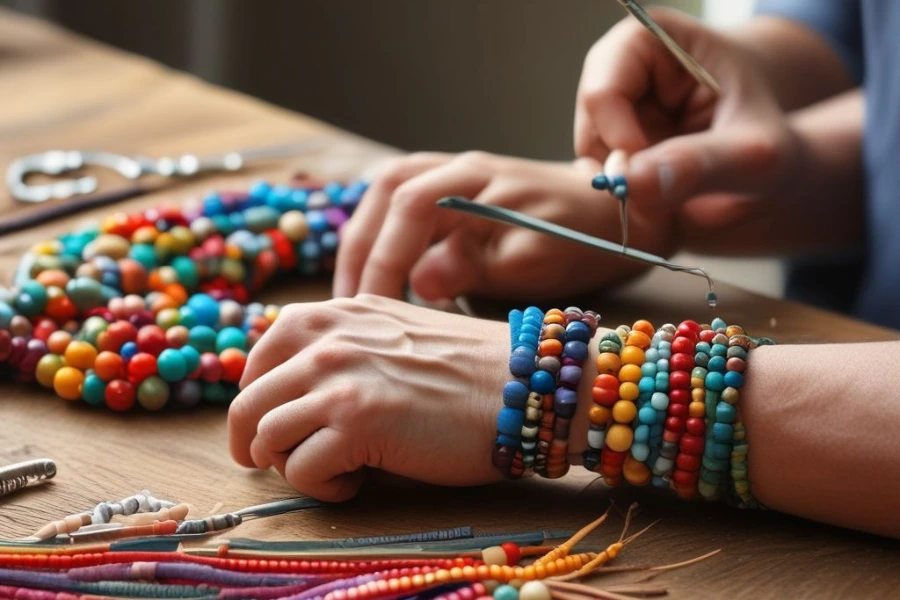
Prepping Your Beads and Thread for Best Results
My regret followed whenever I rushed through this step. I spend more time on preparing beads and checking thread length twice before I begin. I organize all materials visibly before I begin any project. It helps avoid mid-process tangles or mismatches.
It helps avoid mid-process tangles or mismatches. I slightly burn the ends of threads to simplify the threading process. To complete beaded bracelets without clasps proper preparation remains essential.
Select beads whose holes correspond to the thickness of your string. Use a file to smooth rough edges whenever necessary. The final bracelet feels cleaner because of that little extra attention. Careful preparation ensures that the finished piece remains both attractive and durable.
How to Start a Beaded Bracelet with No Clasp
The beginning of my jewelry-making without clasps left me feeling completely confused. Eventually I discovered a technique that felt natural to me. I start by folding the thread in half and then create a loop before moving beads from both sides.
This loop makes the bracelet adjustable later. The design receives a clean anchor through this method. The process of making adjustable bead bracelets without clasps enabled me to create gifts for friends with ease. No sizing stress. The design develops naturally and that’s what I admire.
Beginning with this approach enhanced my ability to produce thoughtful and flexible work. My work process felt more about creating something original than just replicating an established method.
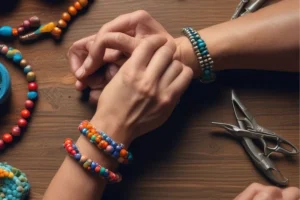
Easy Knot Techniques for a Strong Bracelet Hold
For several weeks I battled with knots that consistently came apart. I discovered the miracle of two surgeon’s knots and double knots that solved my problem. I gradually apply pressure to tighten them while maintaining tension along the cord.
That makes them hold firm without burning. Discovering effective knotting techniques for beaded bracelets revolutionized my crafting experience. Because my bracelets no longer fell apart I wore them with pride.
My standard practice includes applying a small amount of glue or clear nail polish. Just to lock it in place quietly. You spend only seconds tying the knots yet you gain everlasting peace of mind. Handmade jewelry gains confidence from using strong knots.
Using Stretch Cord for a Seamless Bracelet Finish
Stretch cords saved me so many times. The stretch cords offer both flexibility and smoothness while providing a comfortable fit on your wrist. The stretch cords emerged as a magical solution when I began tying bead bracelets without closures.
I managed to put the bracelet on and take it off without causing any harm. I don’t need to use heavy coatings or additional hardware elements. These cords adapt to wrist shapes and easily return to their original form.
Avoiding overstretched knots is essential. While tying my bracelet I gently pull the stretch cord to maintain tension. This little trick gives the perfect balance. Stretch cord serves as your ideal tool for crafting when you look for both simplicity and style.
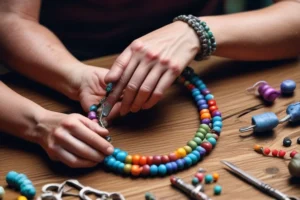
Securing Your Ends with Invisible Jewelry Knots
The final knot always ruined the overall appearance of my products. The knot sticking out was noticeable to me and it caused me irritation. I discovered the method to hide bead bracelet knots without drawing attention to them.
Position them between two beads to make them virtually invisible. I either slightly melt the end or apply a small amount of glue. Nothing too obvious, just clean and smooth. After I learned proper knot tucking techniques my bracelets appeared as though they were crafted by professionals.
That subtle polish really stands out. I now take pride in every finish. A bracelet that feels great and looks equally impressive provides deep satisfaction.
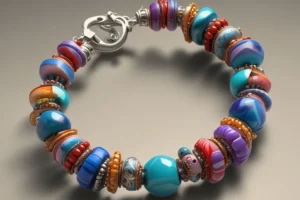
Stylish Ways to Hide Bracelet Knots Without Clasps
I wrapped tape around the ends because I believed it provided a solution. It didn’t. I currently conceal knots inside big beads or use slide covers. As I began searching for methods to finish bead bracelets without the need for clasps my focus shifted entirely to their visual appeal.
Clean lines matter. For hiding knots I occasionally select charm beads that feature wide holes. On other occasions I finish them by wrapping decorative thread in a boho style. I also love using leather wraps. They cover the end and add flair.
Creativity transforms practical objects into bold statements. These handmade items gain their unique personal touch and stylish flair from this creative finishing process.
Common Mistakes When Tying Bead Bracelets
I’ve made every possible error when working with beads. Too tight, too loose, uneven beads. I once failed to measure the length before tying the knot. It barely fit my wrist. When you make bead bracelets without metal findings you eliminate the option to use hardware for later adjustments.
Precise measuring and tension control become essential in bracelet making because there’s no way to correct mistakes after the knots are tied. Also, don’t pull knots too quickly. Let the cord adjust naturally.
I made complex designs because I believed more details led to better outcomes. But really, simplicity and mindfulness win. Learn from each bracelet. Every mistake made me better. Trust your hands. They’ll guide you as your skill grows.
Troubleshooting Common Mistakes
Sometimes knots slip. Other times your bracelet stretches out. These problems are fixable.
- Slipping knots need either glue application or a double knot solution for stability.
- Use either glue or flame to seal the ends of a frayed cord.
- Too tight/loose – Adjust before trimming.
- Plan your bead arrangement ahead of time to prevent uneven beads.
Patience is key. Repetitive practice will lead to achieving a flawless finish.
Final Touches to Make Your Bracelet Look Pro
The whole atmosphere shifts with the smallest details. After completing my bracelets I carefully trim away any loose ends. I smooth every bead line gently. When finishing bead bracelets without clasps the polishing process becomes crucial. At times I apply sheen by using a wax cloth to rub beads.
I always smile whenever I compare my latest pictures with my original photos. I used to rush and regret it. Now I breathe through the last step. The final touch isn’t just about looks. It’s about celebrating what you created. That moment of pride? The feeling of pride remains present each time you wear the piece.
Frequently Asked Questions
What knots work best for bead bracelets without clasps?
It took me several weeks of trial and error to discover that basic knots lacked sufficient strength. The combination of the surgeon’s knot with a double knot led to my breakthrough. I carefully tighten each knot while maintaining cord tension. After tying the knot I apply a small amount of glue or clear polish to keep it in place. These knots changed everything for me. No more slipping. These knots offer strength while remaining easy to tie which provides me peace of mind. I began to wear my bracelets every day without any concerns. I gained satisfaction from realizing my creations could endure everyday situations.
Best string for making bead bracelets without clasps.
I once selected a pretty string for a project but it snapped by the end of the day. That moment taught me a big lesson. Whenever I choose my materials now I pick options that provide strength and flexibility. Stretch cord maintains the first position on my preferred materials list due to its smooth texture and dependable knot retention. For rustic designs I have used waxed thread to achieve the desired earthy appearance. Before using any thread or cord one must test its strength. As I shifted to higher quality strings my bracelets maintained their durability while becoming more comfortable to wear.
Can you make a bead bracelet on elastic without a clasp?
The experience totally shifted my perspective on creating jewelry. I approached the elastic cord with doubt when I first used it. The moment I tried on my first completed bracelet it fit flawlessly like magic. The bracelet fits perfectly because it simply wraps around my wrist without any clasps. A clean and flexible bracelet requires just a gentle stretch of the cord during knotting. I experience a profound sense of liberation when I can create jewelry without relying on metal components. After sharing the bracelets with my friends they also appreciated their simplicity. It feels handmade and full of intention.
What type of thread is best for tying bead bracelets without clasps?
I always believed any thread would work until my preferred bracelet unexpectedly broke. Since then, I never compromise. High-quality stretch cord or waxed thread becomes my choice for clasp-free bracelet designs. Stretch cord creates a tidy finish while waxed thread provides strong security. The ability of both options to maintain knot integrity stands as the most crucial factor. I never use threads that show weakness or fraying when exposed to tension. By choosing better materials for my bracelets I achieved both professional quality and emotional resonance. The foundation of your bracelet determines its durability and strength.