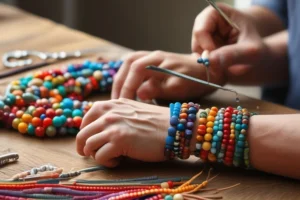
The moment I attempted to attach magnetic clasp to leather bracelets stands out in my memory. It felt impossible. The leather kept slipping. The clasp wouldn’t stay put. I nearly gave up. I wanted to achieve a neat and professional-quality finish for my project.
I wanted to make sure the bracelet would stay intact for more than just a week. Mastering the technique of attaching a magnetic clasp to a leather bracelet transformed my entire crafting experience.
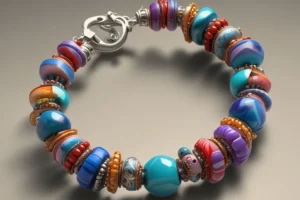
Attaching magnetic clasps to leather bracelets made my DIY projects look more refined. The attachment method provided the bracelet with security and style while also making it strong. For anyone who shares my frustration this guide will provide exactly what you need to ensure your work lasts.
How to Attach Magnetic Clasp to Leather Bracelet
Now it’s time to assemble your bracelet. At your own speed carefully complete each step of the process.
Step 1: Apply Glue to the Leather Tip
Attach a bit of adhesive to the leather tip before moving forward. Spread it evenly.
Step 2: Insert Into One Side of Clasp
Move the adhesive-covered leather end into the clasp opening space. Align it straight and push in firmly.
Step 3: Hold and Press
Maintain pressure on the leather for a duration of 60 seconds. Press with steady pressure for best results.
Step 4: Repeat on Other Side
After completing the first step apply the same procedure to the second leather end so it attaches to the other side of the clasp.
Step 5: Let It Cure for 24 Hours
Don’t touch or test the clasp. The bracelet needs a full day to dry and harden properly.
Choosing the Right Clasp for Leather Bracelets
I began creating bracelets without understanding how important different clasp sizes were. Some were too bulky. Others kept slipping. I discovered that clasp size needs to correspond with both the bracelet’s width and intended use.
The clasp you select for a daily wear bracelet must withstand movement. Lightweight clasps worked best with thin leather bands while sturdier clasps were ideal for bold cuffs.
While testing magnetic bracelet clasps I discovered my preferred design. It locked well and looked refined. The final piece gained a sense of completeness and security from that effortless click.
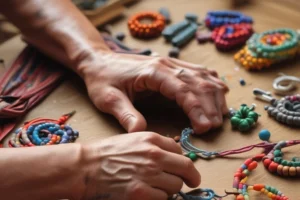
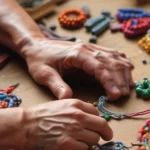
Tools You Need for a Strong Magnetic Connection
My initial belief was that gluing would be sufficient for attaching a clasp. I was so wrong. A solid bracelet needs more than hope. Scissors, jewelry pliers, and leather cement remain within reach at all times.
When tools are tailored to tasks they enable precise fitting and extended durability. I always begin by measuring and cutting the ends neatly before starting any project. Assembling magnetic clasp bracelets brings back memories of my initial clumsy efforts.
Proper tools made me more confident. My bracelets became wearable art. The bracelets retained their integrity even after multiple uses. They stayed beautiful and strong for months.
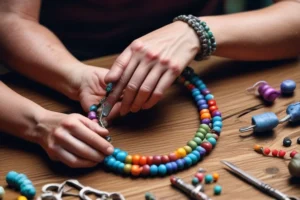
Preparing Leather Ends for Secure Clasp Attachment
The appearance of a bracelet’s clasp cannot compensate for poor quality finishes at the ends. That’s something I learned the hard way. I now exercise greater caution when making leather cuts. I cut the edges precisely to ensure they fit snugly and maintain their position.
Occasionally I use light sandpaper to improve the grip on the edges. After beginning this process my bracelets remained intact. To achieve secure fitment in jewelry construction you must begin with precise foundational work.
Every time I work on securing the magnetic clasp to leather I make sure to double-check its fit first. Knowing that my project will stay intact during use gives me great peace of mind. The satisfaction of finishing work with a smooth texture always justifies the effort required.
How to Attach Magnetic Clasp to Leather Bracelet Properly
I hurried through the process when I first tried attaching the magnetic clasp to the leather bracelet. It didn’t hold. The clasp moves erratically which causes the leather to detach. I test the fit before gluing to ensure proper attachment. I apply the correct amount of glue, apply strong pressure and wait for it to set.
That patience really pays off. The clasp remains secure and maintains a strong attachment on my wrist. A smooth clicking sound when it closes brings satisfaction. Each time I complete a bracelet I take pleasure in this particular step. The successful completion of the process ensures a durable bracelet.
Glue or Crimp Which One Works Best for Longevity
Both glue and crimps have their own specific applications depending on the situation. Initially I chose glue because of its apparent simplicity. When one of my bracelets broke during an outing it caused me pain.
The crimps provided stronger holds for thicker bands after I attempted their use. Through experience I discovered that glue provides a tight fit but crimps offer enhanced strength. I now use both when possible.
The latest magnetic clasp bracelet assembly involved using glue as the primary fastener with a crimp as a backup mechanism. That bracelet is still perfect today. This experience taught me to strengthen security measures and increase carefulness at all times.
Avoid These Mistakes When Securing Magnetic Closures
All the mistakes typical for beginners happened to me and I took lessons from each one. I made a mistake once by not allowing the adhesive to cure completely. The leather ended up too short because of my inaccurate cutting.
My oversight of checking the clasp polarity caused it to push away rather than close properly. Every error took time but provided valuable learning experiences. Now I always test before final fitting. I never rush drying time. I always measure twice before proceeding and make sure to verify the magnet direction.
Each little step counts toward achieving a bracelet with lasting durability. The key difference between a temporary solution and a durable bracelet comes from proper clasp installation procedures.
Waterproofing Tips for Leather and Magnetic Clasps
My bracelets get worn all the time including during outdoor activities. But water was always a problem. The leather became stiff while the clasp strength diminished. I began protecting my leather pieces by applying beeswax or leather protector to them.
I also switched to rust-resistant clasps. The leather stayed soft while my magnets retained their power after I applied that protective treatment. On one occasion I washed dishes wearing my bracelet without remembering to remove it.
It survived perfectly. Now Waterproofing stands as an essential step in my crafting routine. Anticipating future issues is a key part of my process when I fit magnetic clasps on bracelets. I aim to create accessories that can withstand actual living conditions.
Testing the Strength of Your Magnetic Fastener
After completing a bracelet I would immediately put it on to wear. The bracelet broke during a hug with my friend which was embarrassing. That was embarrassing. I test my magnets for strength before using them.
I slowly pull on the bracelet ends before twisting it around and moving it as if it’s on a wrist. I make sure to repair any issues before putting on the bracelet. A properly secured bracelet needs to stay attached during all activities.
Testing my magnetic clasp bracelet after assembling strengthens my confidence to wear it outside. You should discover weaknesses in your product at home before these issues become public. Testing my bracelets gives me peace of mind because it ensures their reliability and safety.
Repair Tips for Loose or Broken Clasp Attachments
While walking one of my bracelets unexpectedly fell off. I was heartbroken but also curious. I disassembled the bracelet and discovered that the leather had experienced slight shrinkage. The glue had loosened too. After trimming the leather end I put new adhesive on it before attaching a fresh clasp. It felt good fixing it myself.
A loose clasp no longer causes me panic. Spare clasps and tools remain close to my workspace all the time. The best practice I have learned is to gently sand down the leather end before applying new glue. It adds grip and strength. Leather magnetic clasps that don’t hold properly can be fixed by following precise repair procedures.
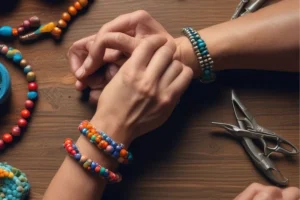
Styling Ideas with Leather Bands and Magnetic Locks
My favorite aspect of styling leather bracelets comes from combining different textures and metals together. Magnetic clasps make that so easy. I stack leather bands together with metal cuffs or gemstone beads in my designs.
Using a combination of thick and thin bracelet styles creates depth on the wrist. Gold and gunmetal clasps pair nicely with neutral leather tones. More people have started layering magnetic bracelets together with smartwatches recently.
It gives such a balanced, trendy vibe. After I assemble magnetic clasp bracelets I experiment with different outfit combinations. The magnetic finish feels modern and easy. Every look becomes significantly more distinctive because of the small clasp.
How to Care for Leather Bracelets with Magnetic Clasps
Caring for leather bracelets serves as a peaceful routine that brings me satisfaction. I gently wipe my bracelets after wearing them to remove sweat. I regularly apply leather conditioner every two or three weeks to maintain their softness. I keep perfume and harsh cleaners away from the clasp area. Magnets maintain their strength if they remain dry and clean.
I arrange my bracelets flat inside a drawer because it prevents them from developing kinks. I perform monthly inspections to identify any signs of wear and tear. After improving my skills in installing leather bracelet clasps I observed they maintain their durability with minimal maintenance. It’s worth those extra seconds each day.
When to Replace a Worn Out Magnetic Jewelry Clasp
No clasp lasts forever. I’ve learned to spot the signs early. The clasp requires replacement when it feels weak and opens too easily. Occasionally magnets lose strength or metal develops discoloration. That’s okay.
The bracelet gains renewed vitality when you replace its clasp. The bracelet I love felt completely revitalized after I upgraded it with a stronger magnet. I keep spare clasps from past projects available for when I need them.
Replacing clasps is a fast solution that extends the life of my beloved designs. When the clasp loses its strength the bracelet still remains wearable. A new magnetic bracelet clasp and some TLC will restore its shine.
Final Thoughts on Making Leather Bracelets Last Longer
My initial bracelet-making attempts produced items that failed to endure beyond a month. Now they stay strong for years. The secret wasn’t just better materials. It was learning to respect the process. The details of each cut, clasp placement and glue application play a crucial role.
I’ve committed errors throughout my experience but gained valuable lessons from each mistake. My advice? Take your time. Test everything. Enjoy the craft. It’s more than jewelry. You create these pieces by hand to wear as a symbol of your dedication and skill.
Each step from attaching the magnetic clasp to the leather bracelet until the final polish plays a crucial role. The process of creating teaches patience while the finished product delivers enduring happiness.
Frequently Asked Questions
How do I prepare the leather before installing a magnetic clasp?
My first step is to trim the leather ends until they are perfectly clean and even. When edges appear rough I use gentle sanding to improve the grip. It makes the glue hold tighter. Through experience I discovered that speeding through this stage results in clasps that become loose over time. The most reliable foundation for a durable hold requires leather that is free of dirt, moisture, and surface imperfections.
Can I install a magnetic clasp without using glue?
The few times I skipped the glue step resulted in mostly poor outcomes. The bracelet separates quickly due to its loose clasp. The glue provides essential additional support to keep your bracelet secure throughout the day. During busy days I ensure durability by always using strong adhesive.
Can I attach a magnetic clasp to thick leather cords?
To secure thicker chords you must use a specially designed clasp. A regular-sized clasp I tried proved incapable of fitting properly. A larger and deeper clasp is necessary to securely hold thicker leather. As soon as I found the correct size the bracelet clicked into place and remained secure.
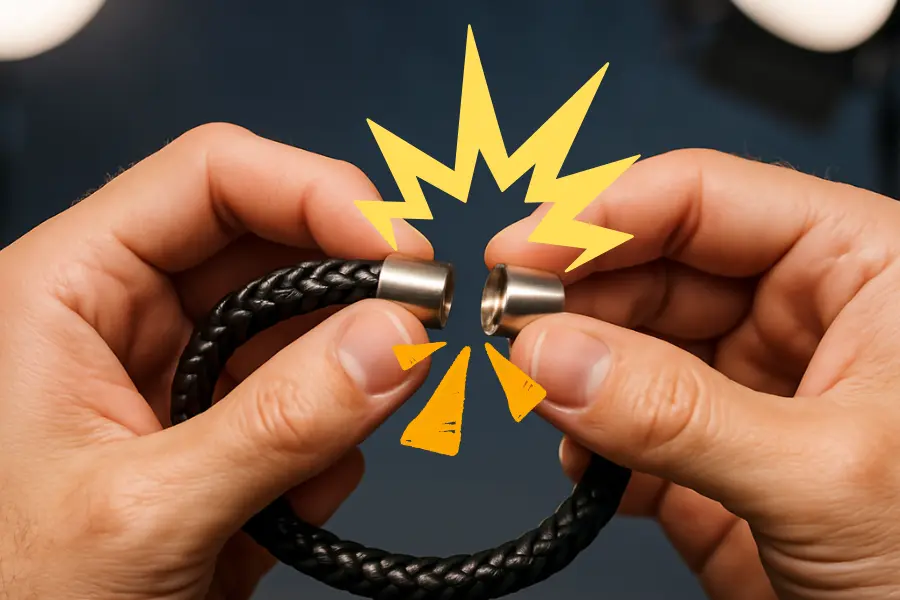
How to align both parts of a magnetic clasp properly?
I used to mess this up often. It’s essential to verify magnet orientation before attaching any components with glue. The first step involves pressing both parts together gently to confirm their natural attraction. When everything aligns properly I proceed with the final fitting. Being patient in this step saves you from unnecessary frustration.
Can I replace a broken magnetic clasp on a leather bracelet myself?
Absolutely. I’ve done it several times. Initially I removed the old clasp with precision then cleaned the leather ends. After that I refit it using a brand new clasp. I experience pure joy when I restore my favorite bracelet to its former glory. With proper attention and appropriate tools you can complete the job.